<?xml version="1.0" encoding="utf-8"?><feed xmlns="http://www.w3.org/2005/Atom" ><generator uri="https://jekyllrb.com/" version="3.10.0">Jekyll</generator><link href="https://jason.wadsworth.dev/feed.xml" rel="self" type="application/atom+xml" /><link href="https://jason.wadsworth.dev/" rel="alternate" type="text/html" /><updated>2026-07-09T19:41:18+00:00</updated><id>https://jason.wadsworth.dev/feed.xml</id><title type="html">Jason Wadsworth</title><subtitle>AWS enthusiast. DevOps believer. Lover of serverless patterns.</subtitle><entry><title type="html">How Much Should You Let an AI Agent Do? Exactly as Much as You Can Verify</title><link href="https://jason.wadsworth.dev/how-much-should-you-let-an-ai-agent-do/" rel="alternate" type="text/html" title="How Much Should You Let an AI Agent Do? Exactly as Much as You Can Verify" /><published>2026-07-09T00:00:00+00:00</published><updated>2026-07-09T00:00:00+00:00</updated><id>https://jason.wadsworth.dev/how-much-should-you-let-an-ai-agent-do</id><content type="html" xml:base="https://jason.wadsworth.dev/how-much-should-you-let-an-ai-agent-do/"><![CDATA[<p>We are about to let software spend our money, send messages in our name, and change records on our behalf, mostly while we aren’t watching. A lot of the attention goes to making an agent that <em>can</em> do those things. The harder part is deciding whether it <em>should</em>, and making sure it can’t overstep. That is the part I want to talk about.</p>

<p>Here’s an example of the problem in one sentence. You tell an assistant “clean up my inbox,” and it deletes nine thousand emails. It wasn’t hacked. It wasn’t malicious. It just did more than you meant. That gap, between what you wanted and what an eager, well-intentioned agent decides to do, is not a model problem. You don’t fix it by making the model smarter. You fix it in the plumbing underneath, the part that grants or denies the ability to act. That plumbing is still being worked out.</p>

<h2 id="whats-actually-broken">What’s actually broken?</h2>

<p>The obvious approach is to give the agent your credentials and let it act as you. Two things are wrong with that.</p>

<p>The first is that the agent inherits your entire reach. Hand it your identity and it can do anything you can do, with nothing scoping how much of that reach any single action gets to use. Security people call that ambient authority: the power is just there, available by default, the moment the agent starts working. Give a tool all of your authority and a loose reading of a vague request, and doing far more than you meant isn’t an edge case. It’s the natural result. The fix for ambient authority is least privilege: each action should carry only the authority it needs for that one thing, and nothing more. Most of what follows is that principle taken to its limit.</p>

<p>The second problem is newer. If a usable access token is sitting in the model’s context, the model can reuse it. For the thing you wanted, or for something you didn’t. A working credential inside a reasoning loop is a loaded gun that the reasoner can pick up at any time. Single-use tokens help, but they do nothing about the model misusing the one use it has, and they just move the question to “what hands out the next token?” The fix has to be more structural.</p>

<h2 id="someone-else-holds-the-keys">Someone else holds the keys</h2>

<p>Here is the idea the rest of this hangs on. The agent should hold no credential at all. Not a broad one, not a narrow one, not even a single-use one. It <em>proposes</em> what it wants to do. Something else decides, and if the answer is yes, that same something carries the action out. The agent never touches a key.</p>

<p>That sounds like a small distinction. It isn’t. If the agent never holds the thing that grants the ability to act, then it no longer matters what the agent believes. Tell it “pending approval” and it cannot act on a misread, because there is nothing in its hands to act with. Tell it “approved” by mistake and it still cannot do anything, for the same reason. When the system is confused, it does nothing. That is exactly the behavior you want from anything that guards an action: the failure direction is <em>off</em>.</p>

<p>So there is something in the middle that holds the keys, decides whether to act on its own or ask a person, and keeps the record. Call it the gate. The agent talks to the gate; the gate does everything else. None of this depends on the agent being trustworthy. It can be eager, confused, or actively hostile. It can only ever propose.</p>

<p>How you actually build a gate like that, and what it costs you, is a bigger topic than one post, and the honest truth is that nothing I know of implements the whole picture today. It is one of the open problems of the agent era. For now, take the gate as a given, because the interesting question sits on the other side of it: when should the gate say yes on its own?</p>

<h2 id="approval-that-cant-quietly-grow">Approval that can’t quietly grow</h2>

<p>Watch what this does to the classic failure. An agent gets a refund of fifty dollars approved, then decides five hundred would make the customer happier. The five hundred is a different request. The gate never approved it, and the agent holds nothing it can stretch, so the bigger refund simply doesn’t happen. It goes back to the gate as what it is: a new thing to decide. You didn’t write a rule against scope creep. There was never a blank check to inflate.</p>

<h2 id="reversibility-is-a-clock-not-a-flag">Reversibility is a clock, not a flag</h2>

<p>If you want an agent to act on its own without a person on every step, you need to know which actions are safe to just let run. The first thing that tells you is whether the action can be undone.</p>

<p>Reversibility isn’t a yes or no. It’s a clock. “Let it run, notify the person, give them a window to cancel” is a fine safeguard, but only if that window is shorter than the time it takes the action to become permanent. A five minute undo on something that’s irreversible in sixty seconds is theater. And reversible actions pile up into irreversible ones. Deleting one email is easy to undo. Deleting nine thousand is not. So reversibility depends on volume, which means it’s tangled up with rate limits and budgets.</p>

<p>That gives you a simple rule. Cheap and reversible, let it run and keep an undo handy. Irreversible or high impact, you don’t get to just allow it on trust. That’s where you either verify it or put a person on it. Autonomous really means autonomous inside the limits you can either undo cheaply or check.</p>

<h2 id="what-is-a-person-actually-approving">What is a person actually approving?</h2>

<p>Not an action. An action <em>for a reason</em>. “Delete this email because I specifically pointed at it” is a different request than “delete this email as part of a cleanup heuristic,” even though the action is identical. So make the reason a structured choice the agent selects from, not a sentence it writes. Two free-text reasons can mean the same thing without being verifiably the same, and the gate can’t tell “I’m doing this for the reason you approved” from “I’m doing this for a reason that sounds like it” when the reason is prose.</p>

<p>Once the reason is structured, the same action can carry different friction depending on why. Delete because the user named it, fine, do it. Delete as a cleanup heuristic, always ask. Overreach almost always rides in on a reason, the proactive one, the bulk one, the clever one. Gating on the reason aims right at the problem. It also lets a person pre-approve a whole class once: “always allow refunds for a duplicate charge under fifty dollars.” That’s how you buy autonomy back without giving up safety.</p>

<h2 id="the-whole-thing-comes-down-to-one-question">The whole thing comes down to one question</h2>

<p>Here’s the catch. A reason the agent <em>picks</em> is still the agent’s word for it. The honest, eager agent’s signature failure is sincerely picking the wrong reason, genuinely believing you asked for something you didn’t. So for anything you want to approve automatically, the reason has to be backed by evidence, and that evidence has to be <em>checked</em>, not just present.</p>

<p>What makes evidence checkable? It has to point at something the agent could not have made up. A record in a system it can’t write to, looked up by the gate, not a blob the agent hands over. (If the agent can manufacture its own proof, you’ve just relocated the lie.) And then the real question is whether checking it requires <em>judgment</em> or just <em>arithmetic</em>.</p>

<p>If a machine can verify it, you can automate it. “Duplicate charge” means two entries in the ledger, same amount, same merchant, minutes apart, neither already refunded. That’s arithmetic. The gate can confirm it and make the refund itself with no human involved.</p>

<p>If verifying it requires interpretation, you can’t. “Ugh, my inbox is a mess” does not mechanically authorize deleting nine thousand emails. Deciding whether it does is exactly the kind of judgment that produced the overreach in the first place, so you can’t hand that judgment to the agent and call it verified. That one stays with a person, permanently.</p>

<p>Which gives you the single sentence this all reduces to. <strong>The amount you can automate safely is exactly the amount whose justification you can check by machine against something the agent can’t fake.</strong> “How autonomous can this be?” stops being a gut call and becomes a measurable property of the work itself.</p>

<p>That word, safely, is the catch. You can let the agent act without verifying anything if you want to. When an action is cheap and easy to undo, that is often the right call. You skip the checking and take the small risk that comes with it. That is a choice, not a loophole, as long as you are clear that you are accepting risk rather than confirming anything. Verification is for the actions you can’t afford to get wrong. For everything below that, a little risk is cheaper than a lot of ceremony.</p>

<p><img src="/images/2026-07-09/autonomy-boundary.png" alt="A decision flow with three outcomes: the agent declares an action, a reason, and grounding; if it is cheap and reversible enough you can allow it and accept the risk; otherwise, if a machine can verify the grounding the gate acts on it, and if it can't the request goes to a person" /></p>

<h2 id="the-honest-ceiling">The honest ceiling</h2>

<p>All of this adds up to a ceiling worth being honest about. A safe autonomous agent today is a bounded one. When it reaches for something genuinely new, against a system nobody deliberately connected it to, the system should fail toward <em>can’t</em>, not toward <em>oops</em>. New capability is always a deliberate act of building, never something the agent grants itself in the middle of a task. That is the whole point, because “an agent helping itself to power nobody gave it” is precisely the thing we are trying to prevent.</p>

<p>So be honest about the trade. You do not get unlimited reach and safety in the same system, and anyone who promises both is selling you the bug as a feature. What you get instead is real and worth having: inside the surfaces you’ve connected, the agent runs on its own; outside them, it stops and asks, or it just stops.</p>

<h2 id="were-not-the-only-ones-here">We’re not the only ones here</h2>

<p>None of this is happening in a vacuum. A lot of serious people are working on the same problem, and when I looked at what they are building, it lined up closely with where I had landed. <a href="https://cloud.google.com/blog/products/ai-machine-learning/announcing-agents-to-payments-ap2-protocol">Google’s Agent Payments Protocol</a> is built on signed “mandates” that authorize a specific purchase and that the agent can’t exceed without asking again. The standards bodies are drafting <a href="https://www.ietf.org/archive/id/draft-oauth-ai-agents-on-behalf-of-user-01.html">on-behalf-of flows</a> so an agent acts with a narrow, traceable slice of your authority instead of impersonating you. Researchers and vendors are converging on <a href="https://next.redhat.com/2026/05/21/zero-trust-for-ai-agents-why-delegation-beats-impersonation/">“delegation beats impersonation”</a> and on permissions that can only narrow as they pass down a chain. The identity giants are racing to give every agent <a href="https://www.okta.com/blog/ai/okta-ai-agents-early-access-announcement/">its own identity</a>, separate from yours.</p>

<p>Still, one thing gets less attention than it should: what actually makes a justification <em>automatically</em> verifiable. The field talks endlessly about “intent” and “justification” while staying vague about the part that has to hold for any of it to run without a person. The line between judgment and arithmetic isn’t a detail. It’s the dial that decides how much an agent can ever safely do on its own.</p>

<p>This is still early. People who study it for a living <a href="https://www.resilientcyber.io/p/identity-is-the-agentic-ai-problem">keep calling it an unsolved problem</a> of the agent era, and the failure they worry about most is people drowning in approval prompts and rubber-stamping them. The way out isn’t asking more often. It’s being honest about what a machine can check and what it can’t, automating the first and saving our attention for the second.</p>

<p>So the next time someone asks how much we should let an agent do on its own, don’t answer with a feeling. Answer with a question. How much of it can we actually verify? That number is your answer, and not a word more.</p>]]></content><author><name></name></author><category term="ai" /><category term="agents" /><category term="security" /><summary type="html"><![CDATA[We are about to let software spend our money, send messages in our name, and change records on our behalf, mostly while we aren’t watching. A lot of the attention goes to making an agent that can do those things. The harder part is deciding whether it should, and making sure it can’t overstep. That is the part I want to talk about.]]></summary></entry><entry><title type="html">Your One-Way Door Swings Both Ways</title><link href="https://jason.wadsworth.dev/your-one-way-door-swings-both-ways/" rel="alternate" type="text/html" title="Your One-Way Door Swings Both Ways" /><published>2026-06-10T00:00:00+00:00</published><updated>2026-06-10T00:00:00+00:00</updated><id>https://jason.wadsworth.dev/your-one-way-door-swings-both-ways</id><content type="html" xml:base="https://jason.wadsworth.dev/your-one-way-door-swings-both-ways/"><![CDATA[<p>In my years of building software, one thing I see a lot is decision paralysis. A team needs to pick a database, or a vendor, or an architecture, and the decision just sits there. Documents get written, meetings get scheduled, opinions get socialized, and weeks go by. When I dig into why a decision is stuck, the answer is almost always the same: somewhere along the way, someone decided it was permanent.</p>

<p>Jeff Bezos gave us one of the most useful decision-making frameworks in business for exactly this problem: one-way doors versus two-way doors. One-way doors are irreversible. Walk through, and you can’t come back. Two-way doors are reversible. If you don’t like what you find, you step back through and try something else. The prescription is simple. Two-way doors deserve fast decisions by individuals or small teams. One-way doors deserve deliberation.</p>

<p>It’s a great framework. And almost everywhere I’ve seen it used, it’s used wrong.</p>

<p>Not because people apply the wrong process to each door type, but because they misclassify the doors in the first place. We label decisions as one-way doors far more often than reality supports, then grant ourselves permission to deliberate, study, and stall. The framework that was supposed to accelerate decisions becomes the excuse for slowing them down.</p>

<p>Here’s the uncomfortable truth: most of your one-way doors swing both ways. You just haven’t pushed on them.</p>

<h2 id="why-do-we-get-the-classification-wrong">Why do we get the classification wrong?</h2>

<h3 id="loss-aversion-does-the-labeling">Loss aversion does the labeling</h3>

<p>We feel losses roughly <a href="https://link.springer.com/article/10.1007/BF00122574">twice as intensely as equivalent gains</a>, something Kahneman and Tversky showed in their work on <a href="https://en.wikipedia.org/wiki/Prospect_theory">prospect theory</a>. So when we evaluate a decision, our brain doesn’t ask “is this reversible?” It asks “how bad would it feel to be wrong?” A decision that would be merely annoying to unwind gets emotionally tagged as catastrophic, and catastrophic feels permanent. The door gets labeled one-way not because of how it works, but because of our fear.</p>

<h3 id="cost-is-not-impossibility">Cost is not impossibility</h3>

<p>Reversing a decision usually costs something: money, time, credibility, an awkward conversation. But cost is not the same as a welded-shut door. Migrating off a vendor is expensive, but it’s not impossible. Unwinding an org structure is painful, but it’s not permanent. When we say “we can’t go back” we usually mean “going back would be uncomfortable”, and those are very different claims.</p>

<h3 id="ego-makes-reversal-feel-like-failure">Ego makes reversal feel like failure</h3>

<p>The real lock on most doors isn’t technical or financial. It’s identity. Reversing a decision means admitting the original call was wrong, and for many leaders that admission feels more costly than living with a bad decision. So we retroactively declare the door one-way to protect ourselves from ever having to walk back through it. This isn’t just my read on it. The <a href="https://www.sciencedirect.com/science/article/abs/pii/0030507376900058">escalation-of-commitment research</a> found that people invest more in a failing course of action precisely when they were personally responsible for choosing it. The irreversibility is self-imposed.</p>

<h3 id="we-evaluate-at-the-wrong-altitude">We evaluate at the wrong altitude</h3>

<p>“Should we adopt this architecture?” sounds like a one-way door. “Should we build one service this way and see what we learn?” is obviously a two-way door. Most big scary decisions decompose into a sequence of small reversible ones, but we insist on evaluating them at the monolithic level where everything looks permanent. The door isn’t one-way. We’re just refusing to open it a crack.</p>

<h3 id="sunk-cost-locks-the-door-over-time">Sunk cost locks the door over time</h3>

<p>A decision that was trivially reversible on day one feels irreversible on day 400. The door didn’t change. We’ve just invested so much that walking back feels like setting money on fire. That’s the <a href="https://www.sciencedirect.com/science/article/abs/pii/0749597885900494">sunk cost fallacy</a> at work. The investment is gone either way, so it shouldn’t be part of the decision.</p>

<h2 id="how-many-true-one-way-doors-are-there">How many true one-way doors are there?</h2>

<p>Genuinely irreversible decisions do exist: selling your company, shipping a security breach, burning a key relationship. These deserve real deliberation.</p>

<p>But run the test honestly. For any decision you’re agonizing over, ask “if this turns out wrong, what specifically prevents us from changing course in six months?” Not what it would cost. What prevents it. Most of the time the answer is nothing. Bezos himself flagged this problem in his <a href="https://s2.q4cdn.com/299287126/files/doc_financials/annual/2015-Letter-to-Shareholders.PDF">2015 letter to Amazon shareholders</a>. As organizations grow they tend to run heavyweight one-way-door processes on nearly everything, and the result is “slowness, unthoughtful risk aversion, failure to experiment sufficiently, and consequently diminished invention.” The danger was never treating two-way doors carelessly. It’s treating two-way doors like one-way doors and grinding decision velocity to a halt.</p>

<h2 id="what-does-this-look-like-in-practice">What does this look like in practice?</h2>

<h3 id="default-to-two-way">Default to two-way</h3>

<p>Make reversibility the starting assumption. The burden of proof should be on the claim that a decision can’t be undone, not on the claim that it can. If nobody can articulate the specific mechanism of irreversibility, it’s a two-way door. Make the call and move on.</p>

<h3 id="price-the-reversal-quickly">Price the reversal, quickly</h3>

<p>When I’m facing one of these decisions, I try to take five minutes to gut-check what unwinding would actually take. “If this vendor fails us, migration is one engineer for six weeks.” That’s it. No analysis doc, no committee. Suddenly the decision that felt existential is just a line item, and you can make it in an afternoon instead of a quarter.</p>

<h3 id="decompose-the-monolith">Decompose the monolith</h3>

<p>When a decision feels like a one-way door, that’s often a signal that it’s too big, not that it’s too risky. Break it into the smallest step that generates real information. Almost every “bet the company” decision contains a “spend two weeks and learn something” decision hiding inside it.</p>

<h3 id="make-reversal-cheap-on-purpose">Make reversal cheap on purpose</h3>

<p>This is where engineering leaders have real leverage. Feature flags, incremental rollouts, abstraction layers at vendor boundaries. These aren’t just good hygiene. Every investment in reversibility converts future one-way doors into two-way doors, which converts future deliberation into future speed. Notice that all of these are things you build, not things you write. The best record of a reversible decision is a system that makes the reversal easy.</p>

<h3 id="reward-the-walk-back">Reward the walk-back</h3>

<p>If reversing a decision is career-damaging in your organization, you’ve institutionalized the misclassification. People will defend bad decisions forever rather than reverse them, and they’ll demand one-way-door deliberation for everything to avoid ever being the person who has to reverse. Celebrate fast reversals as what they are: the system working.</p>

<h2 id="why-does-this-matter">Why does this matter?</h2>

<p>Decision speed compounds. And if you’re worried that speed sacrifices quality, the evidence points the other way. <a href="https://www.mckinsey.com/capabilities/people-and-organizational-performance/our-insights/decision-making-in-the-age-of-urgency">McKinsey’s global survey on decision making</a> found that faster decisions tend to be higher quality, and the organizations that do both well are twice as likely to report superior returns from their decisions. An organization that makes reversible decisions in days instead of quarters doesn’t just move faster on each decision. It runs more experiments, learns faster, and builds an information advantage that slower competitors can’t close. Meanwhile, the organization that treats everything as a one-way door pays twice: once in the delay, and again in all the experiments it never ran because deciding felt too heavy.</p>

<p>So the next time you, or your team, are stuck on a “permanent” decision, ask what actually prevents you from changing course later. Most of the time that deliberation isn’t prudence. It’s fear.</p>

<p>Push on the door. It probably swings both ways.</p>]]></content><author><name></name></author><category term="leadership" /><category term="decision-making" /><summary type="html"><![CDATA[In my years of building software, one thing I see a lot is decision paralysis. A team needs to pick a database, or a vendor, or an architecture, and the decision just sits there. Documents get written, meetings get scheduled, opinions get socialized, and weeks go by. When I dig into why a decision is stuck, the answer is almost always the same: somewhere along the way, someone decided it was permanent.]]></summary></entry><entry><title type="html">Adaptable Infrastructure on AWS: Combining ECS and Lambda Behind an ALB</title><link href="https://jason.wadsworth.dev/adaptive-http/" rel="alternate" type="text/html" title="Adaptable Infrastructure on AWS: Combining ECS and Lambda Behind an ALB" /><published>2025-05-27T00:00:00+00:00</published><updated>2025-05-27T00:00:00+00:00</updated><id>https://jason.wadsworth.dev/adaptive-http</id><content type="html" xml:base="https://jason.wadsworth.dev/adaptive-http/"><![CDATA[<p>I recently attended a session given by <a href="https://www.readysetcloud.io/blog/">Allen Helton (AWS Hero)</a> on the past and future of IaC (infrastructure as code). In it he talked about a future where the infrastructure was more adaptive, allowing you to write code once and have it modify how it runs automatically. This brought me back to something I did about 7 years ago, where I had the same code running in both a container and in Lambda. It wasn’t quite what Allen was talking about because it was a deploy time decision as to how it would run. That got me thinking about what it would take to make something like that work automatically. In this post, I’ll walk through an architecture that leverages both Amazon ECS and AWS Lambda behind a single Application Load Balancer (ALB), enabling you to dynamically shift traffic and infrastructure depending on usage patterns, all while running the same Node.js/Express codebase. I don’t believe this is the end state that Allen was speaking of - I believe it needs to be easier and more automated (less code the developers have to write) - but I think this is an interesting start down that path.</p>

<hr />

<h2 id="-the-challenge">💡 The Challenge</h2>

<p>You have a Node.js application, and you want to serve it efficiently:</p>

<ul>
  <li>During high traffic, use ECS to handle concurrency and throughput cost-effectively.</li>
  <li>During low traffic, save costs by scaling down ECS and using Lambda instead.</li>
</ul>

<p><strong>The goal:</strong> Maximize cost efficiency without sacrificing availability.</p>

<hr />

<h2 id="️-architecture-overview">🏗️ Architecture Overview</h2>

<p>At a high level, this setup looks like:</p>

<p><img src="/images/2025-05-27/adaptive-http.png" alt="Adaptive HTTP" /></p>

<p>A separate Lambda controller function monitors traffic (via CloudWatch alarms) and adjusts the system accordingly.</p>

<hr />

<h2 id="️-the-code-one-app-two-runtimes">⚙️ The Code: One App, Two Runtimes</h2>

<p>You can run the same Express.js app on both ECS and Lambda with minimal changes.</p>

<h3 id="in-ecs">In ECS</h3>

<p>You deploy it as a typical containerized app on Fargate.</p>

<h3 id="in-lambda">In Lambda</h3>

<p>You wrap the Express app using a library like <code class="language-plaintext highlighter-rouge">serverless-http</code>:</p>

<div class="language-plaintext highlighter-rouge"><div class="highlight"><pre class="highlight"><code>    const express = require('express');
    const serverless = require('serverless-http');

    const app = express();
    // define routes here

    exports.handler = serverless(app);
</code></pre></div></div>

<hr />

<h2 id="-load-balancer-setup-with-weighted-target-groups">🔀 Load Balancer Setup with Weighted Target Groups</h2>

<p>Your ALB listener forwards traffic to a <strong>forward action</strong> with two target groups:</p>

<ul>
  <li>ECS Target Group (type: <code class="language-plaintext highlighter-rouge">ip</code>)</li>
  <li>Lambda Target Group (type: <code class="language-plaintext highlighter-rouge">lambda</code>)</li>
</ul>

<p>You assign weights to these target groups. Initially:</p>

<ul>
  <li>ECS weight = 100</li>
  <li>Lambda weight = 0</li>
</ul>

<blockquote>
  <p><strong>Important!</strong> -
If ECS has zero healthy targets, traffic will <em>still</em> route to Lambda—even with a weight of 0. This provides seamless fallback during ECS spin-up.</p>
</blockquote>

<hr />

<h2 id="-responding-to-low-traffic">📉 Responding to Low Traffic</h2>

<p>You’ll need to create an alarm to respond to the changes in traffic in ECS. You can configure the alarm to whatever levels makes sense for you. The alarm should be in an OK state when traffic is high enough to justify using ECS, and in an ALARM state when it should be switched to Lambda.</p>

<blockquote>
  <p><strong>Tip</strong> -
I like to use EventBridge to trigger a Lambda when the state changes, but you can also connect to the alarm directly.</p>
</blockquote>

<p>When a CloudWatch alarm detects low traffic:</p>

<ol>
  <li>A Lambda controller function is triggered.</li>
  <li>It updates the ALB listener rule to:
    <ul>
      <li>Set ECS weight to 0</li>
      <li>Set Lambda weight to 100</li>
    </ul>
  </li>
  <li>It scales down the ECS service to 0 tasks.</li>
</ol>

<p>This stops container usage completely, minimizing costs while keeping the service available via Lambda.</p>

<hr />

<h2 id="-responding-to-high-traffic">📈 Responding to High Traffic</h2>

<p>On rising demand:</p>

<ol>
  <li>The same CloudWatch alarm triggers the controller Lambda.</li>
  <li>It:
    <ul>
      <li>Sets ECS weight to 100</li>
      <li>Sets Lambda weight to 0</li>
    </ul>
  </li>
  <li>It scales up the ECS service (e.g., to your default task count).</li>
</ol>

<p>While the ECS service is starting, if no healthy targets are available, the ALB continues routing traffic to Lambda—even with weight 0—ensuring a smooth transition.</p>

<hr />

<h2 id="-benefits">✅ Benefits</h2>

<ul>
  <li><strong>Efficiency:</strong> Save money by not running idle ECS tasks.</li>
  <li><strong>Resilience:</strong> Lambda catches any gaps during ECS startup.</li>
  <li><strong>Simplicity:</strong> One codebase, two runtimes.</li>
  <li><strong>Flexibility:</strong> Control via Lambda and CloudWatch means no manual intervention.</li>
</ul>

<hr />

<h2 id="️-considerations">⚠️ Considerations</h2>

<ul>
  <li><strong>Authentication and authorization</strong> If you’re a serverless person you are probably used to using some authorization at the point of entry (e.g., at an API Gateway or AppSync). With this model you no longer have the zero trust model of IAM. You can use network security to be sure only certain sources can access your service, just be aware of the implications of doing so.</li>
  <li><strong>Cold Starts:</strong> Lambda functions might introduce latency during first invocation.</li>
  <li><strong>Startup Time:</strong> ECS services take time to start; make sure your fallback duration is appropriate.</li>
</ul>

<hr />

<h2 id="-final-thoughts">🧠 Final Thoughts</h2>

<p>This adaptive pattern gives you the best of both worlds: the scalability and efficiency of ECS for peak loads, and the cost savings and simplicity of Lambda when traffic drops. It has some limitations, and it’s not the right solution for everyone, but it does start to look a little like that future Allen was talking about.</p>

<p>Check out a working example of this <a href="https://github.com/jasonwadsworth/blog-code/tree/main/adaptive-http">here</a></p>]]></content><author><name></name></author><category term="aws" /><category term="serverless" /><category term="Lambda" /><category term="ECS" /><summary type="html"><![CDATA[I recently attended a session given by Allen Helton (AWS Hero) on the past and future of IaC (infrastructure as code). In it he talked about a future where the infrastructure was more adaptive, allowing you to write code once and have it modify how it runs automatically. This brought me back to something I did about 7 years ago, where I had the same code running in both a container and in Lambda. It wasn’t quite what Allen was talking about because it was a deploy time decision as to how it would run. That got me thinking about what it would take to make something like that work automatically. In this post, I’ll walk through an architecture that leverages both Amazon ECS and AWS Lambda behind a single Application Load Balancer (ALB), enabling you to dynamically shift traffic and infrastructure depending on usage patterns, all while running the same Node.js/Express codebase. I don’t believe this is the end state that Allen was speaking of - I believe it needs to be easier and more automated (less code the developers have to write) - but I think this is an interesting start down that path.]]></summary></entry><entry><title type="html">Step Toward Better Tenant Provisioning</title><link href="https://jason.wadsworth.dev/step-toward-better-tenant-provisioning/" rel="alternate" type="text/html" title="Step Toward Better Tenant Provisioning" /><published>2024-07-01T00:00:00+00:00</published><updated>2024-07-01T00:00:00+00:00</updated><id>https://jason.wadsworth.dev/step-toward-better-tenant-provisioning</id><content type="html" xml:base="https://jason.wadsworth.dev/step-toward-better-tenant-provisioning/"><![CDATA[<p>In a multi-tenant SaaS application, you often need to manage resources that are tenant-specific. Whether it’s a tenant-specific role, isolated DynamoDB tables, or per-tenant Cognito user pools, you need to have a way to deploy and update these resources across your application. In this blog, I’ll show you how I have approached this problem.</p>

<p>There are three components of managing tenant-specific resources; creating new resources as a tenant is added, updating resources as your application needs changes, and deleting resources when a tenant is deleted.</p>

<h2 id="the-old-way">The Old Way</h2>

<p><img src="https://jason.wadsworth.dev/images/2024-07-01/eb-Lambda-sdk.png" alt="EventBridge -&gt; Lambda -&gt; SDK to create resources" /></p>

<p>In the past, I would use a model that looks something like the image above to create and delete resources. When a new tenant is added to the system an event is sent out and that would trigger a Lambda function. That Lambda function would use the SDK to create the necessary resources. Similarly, a delete would send out an event that would trigger a Lambda function that would use the SDK to delete tenant-specific resources.</p>

<p>There are some problems with this approach.</p>

<p>First, I like to use CDK, specifically <a href="https://docs.aws.amazon.com/cdk/v2/guide/constructs.html">L2 constructs</a>, for all of my infrastructure. The SDK is very different, so there is a cognitive cost of using the SDK. You often need to remember more details, and the structure is very different.</p>

<p>Second, there isn’t a place to go see all the resources associated with a tenant. This isn’t a big deal when you have one resource per tenant, but as that grows it’s nice to be able to go to a single spot to see everything that belongs to that tenant.</p>

<p>Third, while creating new resources when a tenant is created, and deleting them when a tenant is deleted, is pretty straightforward, updating is not. There isn’t an event that you can use to trigger the update; at least not one that is a system event. Updates, unlike creates and deletes, are deploy time changes. As the application changes, you need to update the infrastructure of your tenants. That’s a very different process than creating and deleting. Updating requires code that is aware of the current state and understands how to go from one to the other. It requires code to handle rolling back into a previous state when something goes wrong. Updates are complicated, and anytime I can remove complicated code I’m going to do it.</p>

<h2 id="a-better-approach">A Better Approach</h2>

<p>Hearing others have the same problem, I wanted to find a solution to make things easier. I knew I wanted CDK and CloudFormation to be a part of the solution, and my thoughts quickly went to <a href="https://aws.amazon.com/step-functions/">Step Functions</a>. Could there be an answer there?</p>

<p>Here is what I figured out.</p>

<p>It starts with CDK. I create a Stack in CDK that holds all the resources for a tenant. This stack includes the use of <code class="language-plaintext highlighter-rouge">CfnParameter</code> to pass in the identifier of the tenant. Any resources that you need to create are added to this stack. The code looks something like this.</p>

<div class="language-typescript highlighter-rouge"><div class="highlight"><pre class="highlight"><code><span class="k">export</span> <span class="kd">class</span> <span class="nx">TenantTemplateStack</span> <span class="kd">extends</span> <span class="nx">Stack</span> <span class="p">{</span>
    <span class="kd">constructor</span><span class="p">(</span><span class="nx">scope</span><span class="p">:</span> <span class="nx">Construct</span><span class="p">,</span> <span class="nx">id</span><span class="p">:</span> <span class="kr">string</span><span class="p">,</span> <span class="nx">props</span><span class="p">:</span> <span class="nx">StackProps</span><span class="p">)</span> <span class="p">{</span>
        <span class="k">super</span><span class="p">(</span><span class="nx">scope</span><span class="p">,</span> <span class="nx">id</span><span class="p">,</span> <span class="nx">props</span><span class="p">);</span>

        <span class="kd">const</span> <span class="nx">parameterTenantId</span> <span class="o">=</span> <span class="k">new</span> <span class="nx">CfnParameter</span><span class="p">(</span><span class="k">this</span><span class="p">,</span> <span class="dl">'</span><span class="s1">TenantId</span><span class="dl">'</span><span class="p">,</span> <span class="p">{</span>
            <span class="na">type</span><span class="p">:</span> <span class="dl">'</span><span class="s1">String</span><span class="dl">'</span><span class="p">,</span>
            <span class="na">description</span><span class="p">:</span> <span class="dl">'</span><span class="s1">The ID of the tenant</span><span class="dl">'</span><span class="p">,</span>
        <span class="p">});</span>

        <span class="kd">const</span> <span class="nx">tenantId</span> <span class="o">=</span> <span class="nx">parameterTenantId</span><span class="p">.</span><span class="nx">valueAsString</span><span class="p">;</span>

        <span class="c1">// any resources you want to provision per tenant go here</span>
    <span class="p">}</span>
<span class="p">}</span>
</code></pre></div></div>

<p>The stack needs to be synthesized and made, so in our tenant management stack I include an S3 bucket where the template will be deployed, I synthesize the above template, and I deploy the synthesized template to the bucket. The keys to this are the use of the <code class="language-plaintext highlighter-rouge">BootstraplessSynthesizer</code> in the template stack and the <code class="language-plaintext highlighter-rouge">Stage</code> that I’ll use to synthesize it. This creates a sort of CDK Inception, where your “cdk.out” will have your synthesized stack(s) and each stack will have another synthesized stack for your tenant template. Accessing the assembly of the stage allows us to grab the output and push it to S3 using the BucketDeploy construct.</p>

<div class="language-typescript highlighter-rouge"><div class="highlight"><pre class="highlight"><code><span class="k">export</span> <span class="kd">class</span> <span class="nx">TenantManagement</span> <span class="kd">extends</span> <span class="nx">Construct</span> <span class="p">{</span>
    <span class="k">public</span> <span class="k">readonly</span> <span class="nx">templateBucketName</span><span class="p">:</span> <span class="kr">string</span><span class="p">;</span>

    <span class="k">public</span> <span class="k">readonly</span> <span class="nx">templateBucketKey</span><span class="p">:</span> <span class="kr">string</span><span class="p">;</span>

    <span class="kd">constructor</span><span class="p">(</span><span class="nx">scope</span><span class="p">:</span> <span class="nx">Construct</span><span class="p">,</span> <span class="nx">id</span><span class="p">:</span> <span class="kr">string</span><span class="p">,</span> <span class="nx">props</span><span class="p">:</span> <span class="nx">TenantManagementProps</span><span class="p">)</span> <span class="p">{</span>
        <span class="k">super</span><span class="p">(</span><span class="nx">scope</span><span class="p">,</span> <span class="nx">id</span><span class="p">);</span>

        <span class="kd">const</span> <span class="nx">stack</span> <span class="o">=</span> <span class="nx">Stack</span><span class="p">.</span><span class="k">of</span><span class="p">(</span><span class="k">this</span><span class="p">);</span>

        <span class="kd">const</span> <span class="nx">templateBucket</span> <span class="o">=</span> <span class="k">new</span> <span class="nx">Bucket</span><span class="p">(</span><span class="k">this</span><span class="p">,</span> <span class="dl">'</span><span class="s1">TemplateBucket</span><span class="dl">'</span><span class="p">,</span> <span class="p">{</span>
            <span class="na">blockPublicAccess</span><span class="p">:</span> <span class="p">{</span>
                <span class="na">blockPublicAcls</span><span class="p">:</span> <span class="kc">true</span><span class="p">,</span>
                <span class="na">blockPublicPolicy</span><span class="p">:</span> <span class="kc">true</span><span class="p">,</span>
                <span class="na">ignorePublicAcls</span><span class="p">:</span> <span class="kc">true</span><span class="p">,</span>
                <span class="na">restrictPublicBuckets</span><span class="p">:</span> <span class="kc">true</span><span class="p">,</span>
            <span class="p">},</span>
            <span class="na">objectOwnership</span><span class="p">:</span> <span class="nx">ObjectOwnership</span><span class="p">.</span><span class="nx">OBJECT_WRITER</span><span class="p">,</span>
            <span class="na">encryption</span><span class="p">:</span> <span class="nx">BucketEncryption</span><span class="p">.</span><span class="nx">S3_MANAGED</span><span class="p">,</span>
            <span class="na">enforceSSL</span><span class="p">:</span> <span class="kc">true</span><span class="p">,</span>
            <span class="na">publicReadAccess</span><span class="p">:</span> <span class="kc">false</span><span class="p">,</span>
            <span class="na">versioned</span><span class="p">:</span> <span class="kc">false</span><span class="p">,</span>
            <span class="c1">// important so that updates can be trigger based on this event</span>
            <span class="na">eventBridgeEnabled</span><span class="p">:</span> <span class="kc">true</span><span class="p">,</span>
        <span class="p">});</span>

        <span class="kd">const</span> <span class="nx">stage</span> <span class="o">=</span> <span class="k">new</span> <span class="nx">Stage</span><span class="p">(</span><span class="k">this</span><span class="p">,</span> <span class="dl">'</span><span class="s1">SynthStage</span><span class="dl">'</span><span class="p">);</span>

        <span class="k">new</span> <span class="nx">TenantTemplateStack</span><span class="p">(</span><span class="nx">stage</span><span class="p">,</span> <span class="dl">'</span><span class="s1">TenantTemplate</span><span class="dl">'</span><span class="p">,</span> <span class="p">{</span>
            <span class="c1">// this allows the synthesis to generate a template without resolving CDK values like account and region</span>
            <span class="na">synthesizer</span><span class="p">:</span> <span class="k">new</span> <span class="nx">BootstraplessSynthesizer</span><span class="p">(),</span>
        <span class="p">});</span>

        <span class="c1">// synthesize the template stack</span>
        <span class="kd">const</span> <span class="nx">assembly</span> <span class="o">=</span> <span class="nx">stage</span><span class="p">.</span><span class="nx">synth</span><span class="p">();</span>

        <span class="c1">// the stage only has one stack, so it's safe to grab index zero here to get the path of the output</span>
        <span class="kd">const</span> <span class="nx">templateFullPath</span> <span class="o">=</span> <span class="nx">assembly</span><span class="p">.</span><span class="nx">stacks</span><span class="p">[</span><span class="mi">0</span><span class="p">].</span><span class="nx">templateFullPath</span><span class="p">;</span>

        <span class="c1">// the bucket deployment construct will copy the resources in the specified path to S3</span>
        <span class="k">new</span> <span class="nx">BucketDeployment</span><span class="p">(</span><span class="k">this</span><span class="p">,</span> <span class="dl">'</span><span class="s1">EachTenantStackDeployment</span><span class="dl">'</span><span class="p">,</span> <span class="p">{</span>
            <span class="na">destinationBucket</span><span class="p">:</span> <span class="nx">templateBucket</span><span class="p">,</span>
            <span class="na">sources</span><span class="p">:</span> <span class="p">[</span><span class="nx">Source</span><span class="p">.</span><span class="nx">asset</span><span class="p">(</span><span class="nx">dirname</span><span class="p">(</span><span class="nx">templateFullPath</span><span class="p">))],</span>
        <span class="p">});</span>
    <span class="p">}</span>
<span class="p">}</span>
</code></pre></div></div>

<p>At this point, I have a template that is being created that can be used for each of our tenants, but I still need to run the template at the right times. I’ll create a few Step Functions to do this.</p>

<p>I’ll start with the create because it’s really hard to test doing an update and delete if you don’t first create it. :) The create is triggered in the same way our Lambda function that was making SDK calls was triggered; via a tenant-created event sent to EventBridge.</p>

<p>The flow looks a bit like this:</p>

<p><img src="https://jason.wadsworth.dev/images/2024-07-01/eb-sfn-cfn.png" alt="EventBridge to Step Functions to CloudFormation" /></p>

<p>The detail of the Step Function looks like this:</p>

<p><img src="https://jason.wadsworth.dev/images/2024-07-01/create-tenant.png" alt="Create tenant resources Step Function" /></p>

<p>The Step Function is actually rather simple. It makes a call to CreateStack using the template I uploaded to the S3 bucket. After calling CreateStack it calls DescribeStack in a loop, checking to see that it has completed and failing if the stack fails. This way I can add metric alarms to notify the team if there are failures.</p>

<p>Next, I’ll do the delete. Like the create, the delete is triggered from a tenant-deleted event sent to EventBridge. This runs a Step Function that looks a bit like this:</p>

<p><img src="https://jason.wadsworth.dev/images/2024-07-01/delete-tenant.png" alt="Delete tenant resources Step Function" /></p>

<p>This one is a bit more complicated than the create because it first checks to see that the template is in a state that allows it to be deleted. This way you don’t end up with errors if you try to delete a stack while it’s in the process of being updated.</p>

<p>Finally, the update.</p>

<p><img src="https://jason.wadsworth.dev/images/2024-07-01/cdk-s3-eb-sfn-cfn.png" alt="CDK to S3 to EventBridge to Step Functions to CloudFormation" /></p>

<p><img src="https://jason.wadsworth.dev/images/2024-07-01/update-tenants.png" alt="Update tenant resources Step Function" /></p>

<p>This Step Function is started whenever the template is updated in the S3 bucket. This means that when the deployment of our tenant management sends the updated template to the bucket this Step Function will run, which will automatically update all of your tenant’s stacks. The State Machine looks a bit overwhelming, but when broken down into its parts it’s pretty easy to understand.</p>

<p><img src="https://jason.wadsworth.dev/images/2024-07-01/update-tenants-tenant-loop.png" alt="update tenant resources Step Function with tenant loop highlighted" /></p>

<p>The first part of this is just getting a list of tenants. I am storing our tenants in a DynamoDB table so I can query the data from there. DynamoDB uses paging, so I have to have some logic to loop over the data and call back into DynamoDB to get the next page.</p>

<p><img src="https://jason.wadsworth.dev/images/2024-07-01/update-tenants-describe-loop.png" alt="Update tenant resources Step Function with the first describe loop highlighted" /></p>

<p>The next bit is checking to see if the tenant’s stack can be updated. This is important because a tenant may be in the process of being created when you deploy a new template. If you don’t do this loop the update will fail and the new tenant won’t get the updates.</p>

<p><img src="https://jason.wadsworth.dev/images/2024-07-01/update-tenants-update-describe-loop.png" alt="Update tenant resources Step Function with the update stack and describe loop highlighted" /></p>

<p>Lastly, the UpdateStack call, and subsequent looping, looks just like our create logic adjusted for an update.</p>

<h2 id="conclusion">Conclusion</h2>

<p>When you are building a multi-tenant SaaS app it’s important to have a strategy for managing any tenant-specific resources you may have. Using Step Functions with the CDK is a great way to manage those updates. With this approach I get to continue to use CDK to model our resources, I have one place to go to see all the resources for a tenant (the CloudFormation stack for that tenant), and the complexities of updating and rolling back changes are managed by CloudFormation.</p>]]></content><author><name></name></author><category term="aws" /><category term="SaaS" /><category term="CDK" /><category term="Step Functions" /><summary type="html"><![CDATA[In a multi-tenant SaaS application, you often need to manage resources that are tenant-specific. Whether it’s a tenant-specific role, isolated DynamoDB tables, or per-tenant Cognito user pools, you need to have a way to deploy and update these resources across your application. In this blog, I’ll show you how I have approached this problem.]]></summary></entry><entry><title type="html">How to Add Paid Features to Your SaaS Apps</title><link href="https://jason.wadsworth.dev/adding-paid-features-to-saas/" rel="alternate" type="text/html" title="How to Add Paid Features to Your SaaS Apps" /><published>2024-05-06T00:00:00+00:00</published><updated>2024-05-06T00:00:00+00:00</updated><id>https://jason.wadsworth.dev/adding-paid-features-to-saas</id><content type="html" xml:base="https://jason.wadsworth.dev/adding-paid-features-to-saas/"><![CDATA[<p>Welcome! This post focuses on implementing feature tiers in SaaS applications, rather than payment processing tools like Stripe or Square. If you’re interested in learning about tiers and managing features for different customer levels, read on!</p>

<p>If you are still here, great! Let’s get into what I am going to talk about.</p>

<ul>
  <li>Why should you consider tiers in your SaaS application?</li>
  <li>How can you manage which customers have what tiers/features?</li>
  <li>How do you add it to your code?</li>
  <li>How do you account for the ”noisy neighbor” problem?</li>
  <li>How do you make sure you’re not losing money?</li>
</ul>

<p>Let’s get started</p>

<h2 id="what-is-the-point-of-tiers">What is the point of tiers?</h2>

<p>When talking about a SaaS application you’ll often hear about tiers or levels. The idea is simply that you have different features that each tier has access to in your application. Usually, the tiers are progressive, so someone in the second tier would get everything included in the first tier plus something more. Why might you want to include multiple tiers?</p>

<h3 id="increase-adoption">Increase Adoption</h3>

<p>If you have an application for which you are currently charging money then adding a lower tier, whether free or just cheaper, you can enable increased adoption of your app. That increased adoption enables some of the next points. If nothing else, more people using your app means more people being aware of your app, which is a good thing.</p>

<h3 id="upsell-opportunities">Upsell Opportunities</h3>

<p>Whether you’re adding a lower tier to increase the number of users or adding a paid, or higher cost, tier, the point of doing it is to upsell. You have users who are currently using your app; hopefully getting value out of it at whatever tier they are in. By adding another tier you have the chance to convert that user into a paid, or higher-paying, user.</p>

<h3 id="learning">Learning</h3>

<p>One thing that is often overlooked when considering a free tier is the value of what you can learn by having more users using your app. If you’ve ever worked in a startup, or just have worked on an app with limited users, you know how challenging it can be to get feedback, and then to understand what value to put on the feedback you get. With a small set of users, you aren’t sure if the request from one or two users is really valuable or just valuable to them. As you increase the number of users in your app you have a chance to hear from a larger audience. That means a bigger sample size and more meaningful data.</p>

<p>Keep this one in mind if you are deciding whether or not to hold on to the lower tier(s) of your app.</p>

<p>It’s also important to always understand your users. Users at different tiers sometimes have different needs. Be sure to weigh your feedback in light of who you are getting the feedback from and test any hypothesis against all of your user personas.</p>

<p>It’s also important to always understand your users. Users at different tiers sometimes have different needs. Be sure to weigh your feedback in light of who you are getting the feedback from and test any hypothesis against all of your user personas.</p>

<h3 id="enablement">Enablement</h3>

<p>Speaking of understanding user needs, one last point on the “why” of offering tiers is that it can enable you to do things that you can’t do for free, or can’t do at the price of your current app. Imagine you want to add a cool AI feature to your app. It sounds like a great idea, but you quickly realize that giving it away for free is too expensive. By adding a new tier you can charge a fee that makes adding that feature an option. This can be true even if you aren’t looking to make money; you can price it in a way that at least covers the cost.</p>

<h2 id="tier-management">Tier Management</h2>

<p>Now that we understand some of the reasons why you might want to add tiers, how do you manage them?</p>

<p>I’ll start with some things you shouldn’t do…</p>

<h3 id="dont-build-your-own-tools">Don’t Build Your Own Tools</h3>

<p>As engineers, we always think we can do that. We’ll look at some problem and decide that it’s not a hard problem to solve and we’ll go off and solve it. Don’t fall into this trap. Engineering resources are precious; spend them on things that add value to your app, your users.</p>

<h3 id="dont-make-it-complicated">Don’t Make it Complicated</h3>

<p>I’m always telling people to stop making things more complicated than it needs to be. Solve the problem that is in front of you, not one that you might have later. This is true with tier management. In its simplest form it’s just a true/false; does this tenant have this tier. It can become more complex later, as you learn, but start simple…always.</p>

<p>There are, of course, some things you can/should do as well…</p>

<h3 id="do-use-3rd-party-tools">Do Use 3rd Party Tools</h3>

<p>This kind of goes without saying since it’s the opposite of the first don’t I listed, but it’s worth restating and giving some examples. Using tools from third parties means taking advantage of what they have done so you don’t have to do that work. This means you are free to build things that make your app special. I like to use feature flag tools for this. Some examples are <a href="https://launchdarkly.com/">LaunchDarkly</a>, <a href="https://www.split.io/">Split</a>, and <a href="https://aws.amazon.com/systems-manager/features/appconfig/">AWS App Config</a>. I can’t say I’ve used App Config, but the principles behind all of these are about the same; you pass in some bit of information and it tells you if the thing is on/off. It’s a simple way to get tier management without a lot of work. Plus, if you aren’t using feature flags in your app already you really should consider them. That’s probably worth a blog post of its own.</p>

<h3 id="start-with-options-that-dont-scale">Start With Options That Don’t Scale</h3>

<p>This is something you’ll hear a lot in the startup space, but it’s true everywhere. When you are doing something new you don’t know how successful it will be. Don’t spend time building things to make your life easier when it does before knowing if it will. It’s okay if the first implementation of your tier management is someone going into your feature flag tool and manually changing values. You can track your billing in Excel when you’re just getting started. Sure, those options are going to be painful if you are successful, but that’s the point when you should increase the automation; not before.</p>

<h3 id="build-as-you-grow">Build As You Grow</h3>

<p>Eventually, those things that don’t scale will be pain points, for you and possibly for your users. As that happens start to build. Add something to automatically set values in the feature flag tool using their APIs. Send out invoices automatically with some sort of billing software. Even an internal UI that makes tier management a little easier can be a quick win that improves things just long enough to get to the next level of scale.</p>

<h2 id="how-do-you-make-it-work">How Do You Make It Work?</h2>

<p>At some point, you have to start putting something in the code. Here are some things to keep in mind when you do so.</p>

<h3 id="focus-on-features-not-tiers">Focus On Features, Not Tiers</h3>

<p>We’ve been talking about tiers a lot, but what tiers really are is a collection of features. When you are adding features to your code you should mostly be thinking in terms of those features, not the tiers themselves. We’ve all seen pages that look something like the following:</p>

<p><img src="https://jason.wadsworth.dev/images/2024-05-06/tier-feature.gif" alt="Tiers and Features" /></p>

<p>Each tier shows you what features are included. Imagine if you want to move a feature from the basic tier to the free tier. If you focus on tiers then you have to go into the code and make that change. That doesn’t sound so bad, after all, it’s just one feature, so just one place in the code. What if you decided to add a whole new tier? Now you have to find every feature throughout the code and make sure the new tier is included in all the right spots. This makes changing tiers difficult and limits your sales and marketing options.</p>

<p>In addition to allowing you to change tiers, taking a feature-based approach allows you to grandfather in users when you make changes, and even do ala-cart sales where individual features are added for particular customers.</p>

<h3 id="dont-confuse-permissions-and-features">Don’t Confuse Permissions and Features</h3>

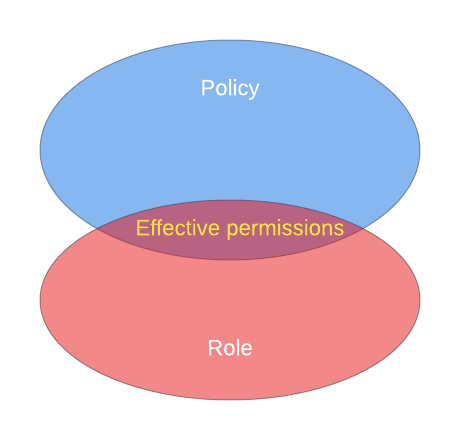
<p>There is some crossover between permissions and features, so it’s easy to think they can be seen as the same. Both may result in a 403 - forbidden response from an HTTP call, after all. While they do have things in common, they are different.</p>

<p><img src="https://jason.wadsworth.dev/images/2024-05-06/permissions-features.png" alt="Permissions and Features Venn Diagram" /></p>

<p>Permissions will often go beyond the high-level “can you access this feature?” and into object-level permissions. A user may be allowed to access the files feature, but may only be able to see certain files.</p>

<p>Features, on the other hand, will often go into application flow. You may have permission to access the search feature, for example, but a feature flag may determine whether you use the standard search or the AI-based search. There isn’t a permission issue, it’s just a different path within the code.</p>

<h3 id="use-feature-flags">Use Feature Flags</h3>

<p>I already touched on this a bit; feature flags are a great way to determine what features a user/tenant can access. The code snippet below shows a quick example of what it might look like to evaluate whether a user can access a particular API. In this example, we have a Lambda function that is being called by AppSync. Our AppSync is using a custom authorizer where we are adding the <code class="language-plaintext highlighter-rouge">tenantId</code> and <code class="language-plaintext highlighter-rouge">userId</code> to the <code class="language-plaintext highlighter-rouge">resolverContext</code>. All the code does is make a call to the feature flag service to determine the flag value for the given context. We use the <code class="language-plaintext highlighter-rouge">userId</code> as the key, but the important data point here is the <code class="language-plaintext highlighter-rouge">tenantId</code>. That’s the value that we’ll have rules for to determine whether the value is true or false. If it’s false we’ll simply throw an error and we’re done. If it’s true then it does what it would normally do. Again, keep it simple to start with. Many of the feature flag tools have capabilities beyond simple true/false evaluation, but that’s all you need to get started.</p>

<p><img src="https://jason.wadsworth.dev/images/2024-05-06/feature-flag-code.png" alt="Feature Flag Code Example" /></p>

<h3 id="make-sure-the-ui-is-aware">Make Sure the UI is Aware</h3>

<p>When you’re building a UI that has different levels of permissions it’s a good practice to hide things from users that they can’t do. This limits confusion and generally creates a better user experience. How many of you have clicked a button in the AWS console only to be given an error message saying you aren’t allowed. Not a great experience.</p>

<p>When dealing with tiers and features you want to take a different approach. As we’ve already said, permissions and features are not the same. When you have a feature that is available to the user at a different tier you want the UI to show that to them. That doesn’t mean it should look like you can do something and it will give you an error when you try it. Let’s avoid rebuilding the AWS console experience. But you can grey out a button and show a message when the user hovers over it.</p>

<p><img src="https://jason.wadsworth.dev/images/2024-05-06/feature-hint.png" alt="Feature Hint in UI" /></p>

<p>Making sure your UI is aware is how you upsell. You have users in the app who may not realize what additional capabilities your app offers at higher pricing tiers. Tell them!</p>

<h2 id="dealing-with-noisy-neighbors">Dealing With Noisy Neighbors</h2>

<p>When you build a SaaS application you’re most often hoping to get some cost benefits from having your different tenants share resources. This creates the opportunity for what is referred to as the noisy neighbor problem. It happens when one tenant is impacted by or is impacting other tenants. In a multi-tier application, this can happen in several ways, and its impact can be made worse when paid customers feel like the free-tier tenants are causing the system to slow down. This is particularly noticeable if you add a free tier and suddenly everything is worse.</p>

<p>There are things you can do to help.</p>

<h3 id="rate-limiting">Rate Limiting</h3>

<p><img src="https://jason.wadsworth.dev/images/2024-05-06/rate-limiting.gif" alt="Rate Limiting" /></p>

<p>There is a reason why every API, every service, in AWS has limits. The main reason is that AWS is IaaS/PaaS. Those share the same noisy neighbor problem as a SaaS app. Rate limiting allows you to limit how much any one user or tenant can use your system. By controlling the rate at which tenants can use your application you can avoid becoming overwhelmed by a single tenant.</p>

<p>In AWS one way to achieve this is by utilizing <a href="https://docs.aws.amazon.com/apigateway/latest/developerguide/api-gateway-api-usage-plans.html">usage plans</a> in API Gateway. With a usage plan, you can set the maximum rate for calls with the same API key. The nice thing is that you can have different usage plans so you can have different limits for different tiers. You might want your paid customers to be able to hit your APIs more frequently than the free ones, and usage plans make that easy to do.</p>

<p>If you aren’t using API Gateway (REST API to be specific) your options are a bit more limited. You can get some benefit from <a href="https://aws.amazon.com/waf/">WAF</a>, though it’s not really designed to be tenant-based. Still, it can help. Beyond that, you’re mostly on your own. Keep in mind that anything you implement in your code is already sharing some amount of resources. Let’s just hope AWS decides to add it to other places, like AppSync, in the near future.</p>

<h3 id="segmented-queues">Segmented Queues</h3>

<p><img src="https://jason.wadsworth.dev/images/2024-05-06/segmented-queues.gif" alt="Segmented Queues" /></p>

<p>If you’ve ever gone to an amusement park you’ve seen how queues work. You stand in line and wait for your turn. In a SaaS application, you may want to have your paid customers going through a different queue than your free customers. Think of this like the fast pass at an amusement park. The fast pass is still a queue. It goes to the same ride. It just has fewer people in it, so you get your turn faster. You can do the same thing by sending your data to different queues, one for the free tier and one for the paid. The great thing about this is that the same Lambda function is used by both. And because you can set the concurrency at the integration you can have each queue processing messages at different speeds. You can even go so far as to set up a queue for a single tenant.</p>

<h3 id="tenant-partitioning">Tenant Partitioning</h3>

<p>As your application grows you may want to have a multi-account strategy in place. You may start by thinking you can put all your free tier customers in one AWS account and your paid customers in another. While this strategy does make sure your free tier tenants aren’t impacting your paid tier tenants it does create a couple of issues.</p>

<p>First, it doesn’t necessarily balance the workload. You may have some paid tenants who aren’t doing much and some free tenants who do a lot. You really want a balance so that each account is doing a similar amount of work. That allows you to keep the account settings the same, making it easier to manage.</p>

<p>Second, tenants are, hopefully, moving between tiers (hopefully going from free to paid). If you isolate the tenants by tier you need to have a migration plan in place for when a tenant changes tiers. That can be expensive and complicated, especially if you want the tenant to keep working while you migrate them.</p>

<p>Instead of separating by tier, I like to do a weighted assignment approach. As a new tenant is added to the application the system determines where that tenant should go based on the usage of the current tenants. You can’t know how the new tenant is going to behave but you can at least understand how the existing ones do and use that information to decide where to put a new tenant.</p>

<p><img src="https://jason.wadsworth.dev/images/2024-05-06/tenant-partitioning.gif" alt="Tenant Partitioning" /></p>

<h3 id="monitoring">Monitoring</h3>

<p>No matter how you decide to manage the noisy neighbor problem the one you you really should do is have monitoring in place. It’s important to understand how your system is behaving at all times so you can make adjustments before your customers start to complain. Monitor things like latency, iterator age, message age, concurrency, and anything else that can impact the performance of your application. Use AWS tools at a minimum.</p>

<h2 id="understanding-your-cost">Understanding Your Cost</h2>

<p>Even if you aren’t adding multiple tiers to your app you really should try to understand the costs of each tenant/user. When you’re considering adding tiers, either up or downstream, this information is crucial in understanding how much to charge and what features belong in what tier.</p>

<h3 id="custom-metrics">Custom Metrics</h3>

<p>You can use the AWS metrics to get a lot of information, but it does have its limits. When you can’t get what you need from the out-of-the-box metrics create your own. Add it anywhere you have a feature that you want to understand better. If nothing else just record that the feature was used. Make sure you are recording metrics for anything that you might want to give away. You don’t want to be surprised by the cost of something you gave away for free.</p>

<h3 id="include-tier-and-tenant">Include Tier and Tenant</h3>

<p>When you are adding your custom metrics be sure to include both the tier and tenant identifier to the metric as dimensions. This will allow you to look at the data aggregated by tier as well as to see how an individual tenant is using your app. It also can allow you to exclude a tenant if you believe their behavior is an anomaly.</p>

<h3 id="gather-real-use-data">Gather Real Use Data</h3>

<p>Some APIs, like DynamoDB, return the actual usage with each call. For S3 you can see the size of the objects via EventBridge. Record that information, with tier and tenant added, so that you can see how much things will actually cost. While you can get this information from the generic AWS metrics you won’t be able to see it by tier or tenant.</p>

<h2 id="recap">Recap</h2>

<p>There are so many things to think about as you make decisions about adding tiers to your app. We talked about a few key points today:</p>

<ul>
  <li>Tiers allow you to upsell your app</li>
  <li>Feature flags are a great way to manage tiers/features</li>
  <li>Focus on features, not tiers to allow for greater flexibility</li>
  <li>Don’t forget about your neighbors</li>
  <li>Always be aware of cost</li>
</ul>

<p>If you want to hear some more thoughts on this topic check out the <a href="https://www.youtube.com/watch?v=x0F9I8tuKNY">presentation</a> I recently did on this subject with the <a href="https://believeinserverless.com">#BelieveInServerless</a> group. There was a lot of great discussion that followed the presentation.</p>]]></content><author><name></name></author><category term="aws" /><category term="SaaS" /><summary type="html"><![CDATA[Welcome! This post focuses on implementing feature tiers in SaaS applications, rather than payment processing tools like Stripe or Square. If you’re interested in learning about tiers and managing features for different customer levels, read on!]]></summary></entry><entry><title type="html">Lambda-less AppSync for SaaS</title><link href="https://jason.wadsworth.dev/lambda-less-app-sync-for-saas/" rel="alternate" type="text/html" title="Lambda-less AppSync for SaaS" /><published>2024-03-05T00:00:00+00:00</published><updated>2024-03-05T00:00:00+00:00</updated><id>https://jason.wadsworth.dev/lambda-less-app-sync-for-saas</id><content type="html" xml:base="https://jason.wadsworth.dev/lambda-less-app-sync-for-saas/"><![CDATA[<p>As a builder of SaaS software, I often find myself looking at services like AppSync with a bit of jealousy. See, AppSync has a way for you to interact directly with services like DynamoDB, removing the need for a Lambda function, and the cold starts that come with it. As a SaaS builder, these direct integrations have always been out of reach because of the inability to secure the data at the tenant level. Due to some features introduced by the Step Functions team last year, there now is a way. In this post, I’ll walk you through how you can access DynamoDB data from an AppSync API without the need for a Lambda function, all while maintaining tenant data isolation.</p>

<h2 id="tenant-isolation">Tenant Isolation</h2>

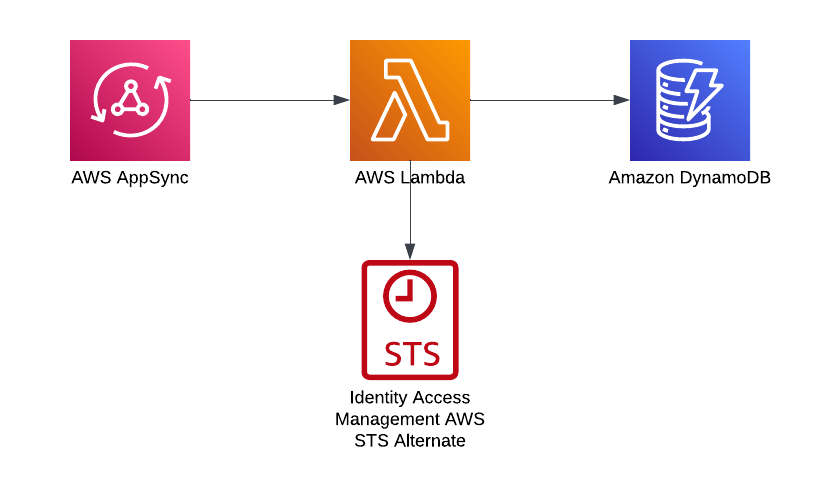
<p>Before getting into the details of how this solution works let’s be sure we understand the problem we are trying to solve. If you are building a multi-tenant SaaS application your application must be built in such a way that one tenant isn’t able to access another tenant’s data. I talk about this in some of my talks and have written some blogs about it as well. It’s not enough to write code that isn’t supposed to access the wrong tenant’s data, you need to build the protection into the system; so that the code doesn’t work at a permission level if it attempts to access the wrong tenant. An attempt to access the wrong tenant’s data shouldn’t just be a bug, it should be a failed operation. It just shouldn’t be possible. This is where the problem with AppSync direct integrations comes in. When you have AppSync querying DynamoDB, for instance, you grant AppSync specific permission to do so. Those permissions aren’t unique to the caller, they are only unique to the specific integration. So if tenant 1 calls the API it looks the same, at the permission level, as if tenant 2 makes the call. Not great for isolation.</p>

<p>The typical solution to this problem is to have your AppSync talk to a Lambda function. Somewhere along the way, you do an STS AssumeRole operation to get credentials specifically for the tenant on which you want to operate and use those credentials to talk to DynamoDB. These credentials are scoped to the tenant, so you can only get data for that tenant. There are some different ways of accomplishing this, but in the end, it comes down to each call to the DynamoDB table being made with credentials specific to the tenant making the request. If you were to request data for another tenant the permissions wouldn’t allow it.</p>

<p><img src="/images/2024-03-05/AppSync-Lambda.png" alt="Typical SaaS solution" /></p>

<p>Unfortunately, that option isn’t available to us with direct integrations. I’d love to see that change, but for now, it’s just not possible.</p>

<h2 id="step-functions-cross-account-access">Step Functions Cross Account Access</h2>

<p>Sometime back in 2023, the <a href="https://aws.amazon.com/blogs/compute/introducing-cross-account-access-capabilities-for-aws-step-functions/">Step Functions team announced a feature that would allow you to run a state machine task from one account and have it access resources in another</a>. It turns out that this feature has a use within the same account, too.</p>

<p>While Step Functions Cross Account Access was designed for…well, cross-account access, it’s really just telling Step Functions what role to assume to perform the task. You can use that same mechanism within an account to have the state machine assume a specific role for a task. For example, let’s say you want your state machine to assume a role for a specific tenant, with permissions scoped down to just that tenant’s data. See where I’m going here? Because the role in the state machine can be dynamic, you can have a Step Function that assumes the role of the specified tenant, and reuse the Step Function across all your tenants, much like you would a Lambda function.</p>

<h2 id="step-functions-sdk-integrations">Step Functions SDK Integrations</h2>

<p>One of the great things about Step Functions is that it has literally hundreds of integrations available. You can make calls to most AWS services via the <a href="https://docs.aws.amazon.com/step-functions/latest/dg/supported-services-awssdk.html">SDK integrations</a>, or use the <a href="https://docs.aws.amazon.com/step-functions/latest/dg/connect-supported-services.html">optimized integrations</a> for a smaller set of integrations. And with the ability to specify the role you want to be assumed you can call them with the permissions scoped to just the current tenant.</p>

<h2 id="appsync-and-step-functions">AppSync and Step Functions</h2>

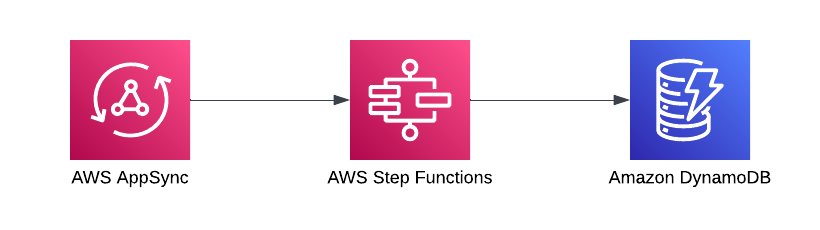
<p>So far we have talked about how to have Step Functions access data for a particular tenant. What we want is for an integration with AppSync that doesn’t require a Lambda function. This is where the <a href="https://aws.amazon.com/blogs/mobile/invoking-aws-step-functions-short-and-long-running-workflows-from-aws-appsync/">Express State Machine integration with AppSync</a> comes into play. With Express functions you can make synchronous Step Function calls that run the state machine directly.</p>

<p><img src="/images/2024-03-05/AppSync-StepFunctions.png" alt="AppSync to Step Functions" /></p>

<p>There isn’t anything new about this feature, so I won’t go into the details. The main point is that you can call a Step Function from AppSync and return data from there.</p>

<h2 id="putting-it-all-together">Putting it All Together</h2>

<p>Now that we understand that we can use Step Functions to make direct API calls with a tenant-specific IAM role, and we can call Step Functions from AppSync, how do we put this together?</p>

<p>To get this all to work safely we need to step back a bit and talk about the authentication. If you’ve read any of my previous posts on SaaS you’ve seen that I’ll typically have a <a href="https://aws.amazon.com/blogs/mobile/appsync-lambda-auth/">custom authorizer</a> that not only validates the user (typically via JWT validation) but also obtains credentials for that user’s tenant. In this case, we’ll take a slightly different approach. Because Step Functions will be assuming the role for us we don’t need to provide credentials, but we do want to provide the role that the Step Function should use. We’ll add the tenant-specific role ARN to the <code class="language-plaintext highlighter-rouge">resolverContext</code> of the custom authorizer. This value will be available as part of the input to your Step Function. Specifically, you can access anything that you put in the <code class="language-plaintext highlighter-rouge">resolverContext</code> at <code class="language-plaintext highlighter-rouge">$.identity.resolverContext</code> in your state machine.</p>

<blockquote>
  <p>Tip:
You can access the input arguments of your Step Functions state machine from anywhere in your state machine by going through the context object, which is accessible by using the <code class="language-plaintext highlighter-rouge">$$</code> notation. More information about the <a href="https://docs.aws.amazon.com/step-functions/latest/dg/input-output-contextobject.html">context object can be found here</a>.</p>
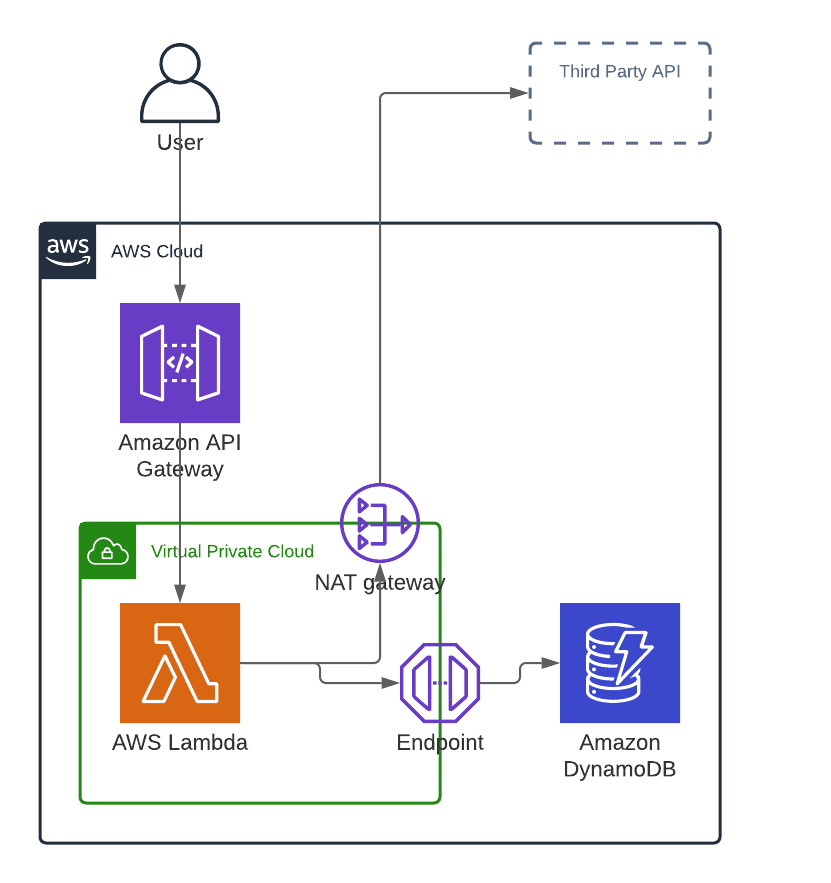
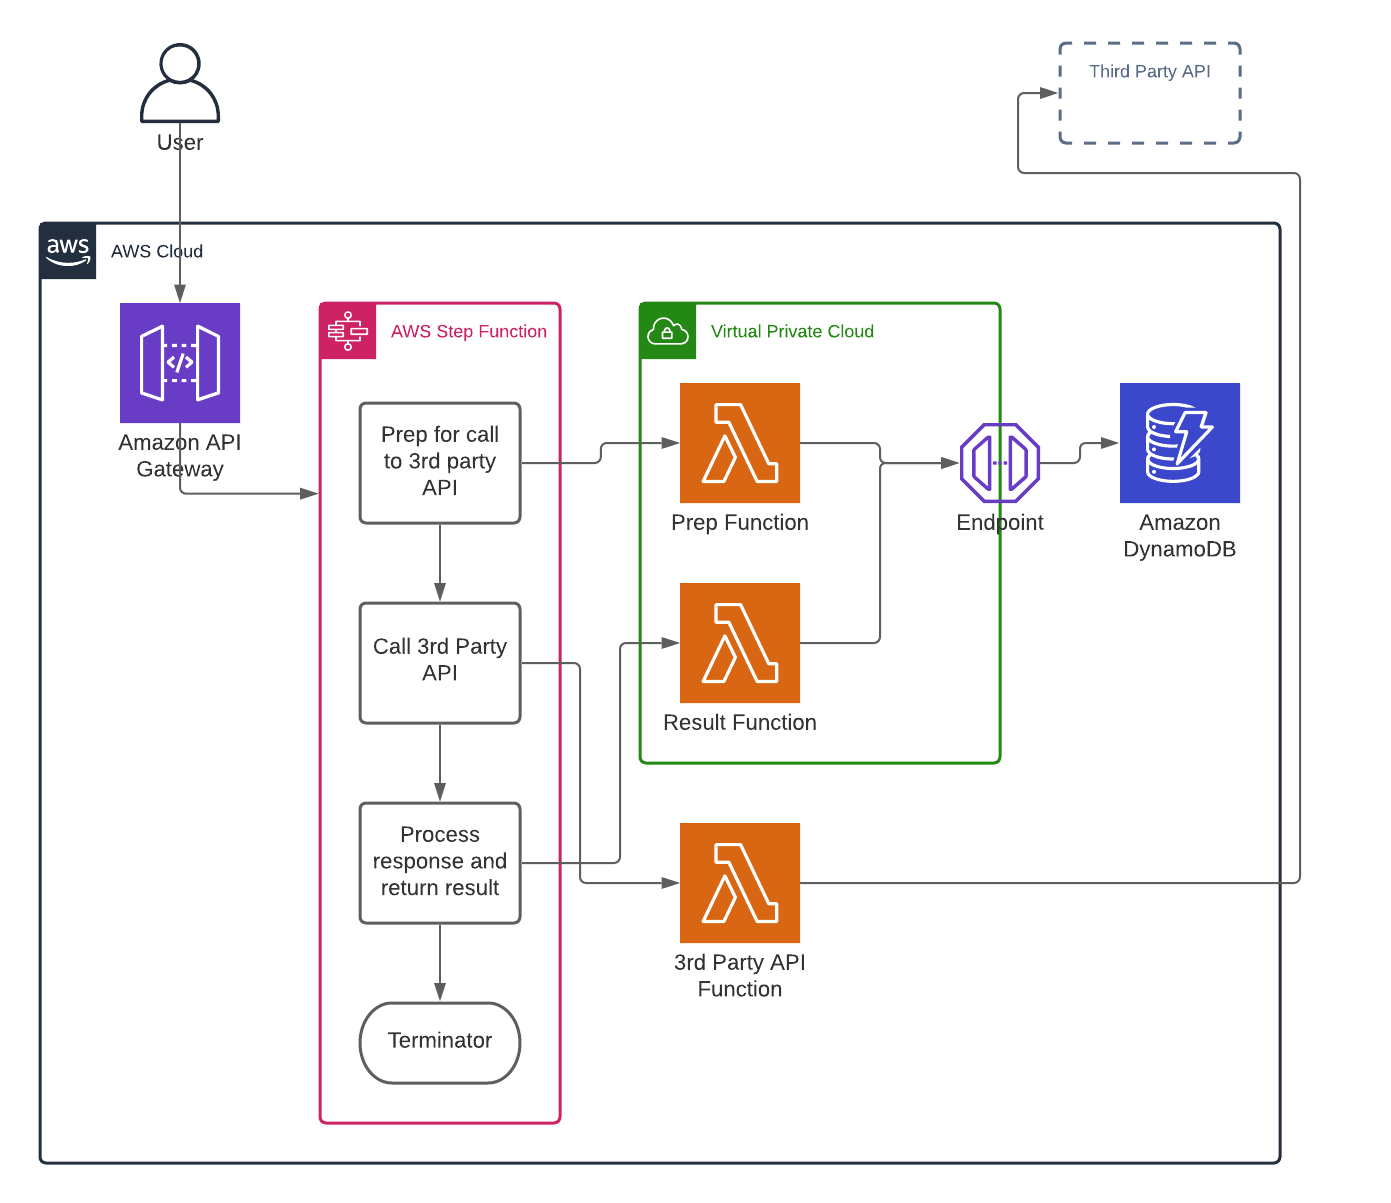
</blockquote>

<p>You may be tempted to make the name of the role something like <code class="language-plaintext highlighter-rouge">TenantRole&lt;tenant id&gt;</code> so that you can easily put together the role name anywhere that needs it. Doing so is not advisable because it can lead to the very problem we are trying to avoid. If the Step Function is determining the role to assume then it can make a mistake and use the wrong role. This, combined with a mistake about which tenant to access, allows the wrong tenant’s data to be returned. Instead, you should have the tenant’s role names be somewhat random. I like to use a ULID and store the name of the role with information about the tenant.</p>

<p>There is one more thing to keep in mind here. You probably want to limit what roles your Step Function can assume, but you don’t know the names of the roles. I like to take advantage of the <code class="language-plaintext highlighter-rouge">path</code> of the role to make this easier. All my tenant-specific roles have a path that is something like <code class="language-plaintext highlighter-rouge">/tenant-role/</code>, which allows me to create an IAM policy that only allows assuming roles that are at that path. You can also limit what services can assume the role via the assume role policy document. Just be sure to keep in mind all the places you might want to assume this role (it’s probably not just Step Functions).</p>

<h2 id="the-tradeoffs">The Tradeoffs</h2>

<p>This may all sound a bit too good to be true. That’s probably because there are some tradeoffs to be aware of.</p>

<ul>
  <li>The first, and probably the most important, is that each tenant must have their own role. Quite often we use a <a href="https://aws.amazon.com/blogs/apn/isolating-saas-tenants-with-dynamically-generated-iam-policies/">single role, with a dynamic policy, for tenant isolation</a>. This has several advantages, not the least of which is that you don’t have to manage all the roles. Unfortunately, the Step Functions integration doesn’t allow for a dynamic policy (wouldn’t that be nice?). The importance of this tradeoff can’t be overstated. There is a hard limit of 5000 IAM roles per account. If you expect to have more than maybe 1000-2000 tenants you need to consider how you will manage the role limit. You might look into tenant sharding to help (Bill Tarr talks about this a bit in his talk <a href="https://youtu.be/sPk_-wdbl8U?si=yD06LKEDu4dGAUhB">SaaS architecture pitfalls: Lessons from the field</a> from re:Invent 2023). In addition to the IAM limits, you need to be able to update these roles if and when your application’s needs change. There are several options here, just know that this is something you have to deal with that isn’t an issue when using dynamic policies.</li>
  <li>Another tradeoff here is that there aren’t utility functions in either AppSync or Step Functions for unmarshalling DynamoDB formatted data. Interestingly there is a way to marshall the data in AppSync, but the AppSync direct integration automatically unmarshalls the data on the way out, so there isn’t a way to do that. What does this mean? A lot of very specific mapping code that has to convert the ugliness of DynamoDB JSON into something a bit more useful.</li>
</ul>

<h2 id="conclusion">Conclusion</h2>

<p>AppSync direct integrations are a great way to allow your API to get data without needing a Lambda function. Until recently, these integrations didn’t work for multi-tenant SaaS apps. With the introduction of cross-account Step Function tasks, we can now leverage the direct integrations in AppSync and Step Functions to allow us to build a multi-tenant API using AppSync without using a Lambda function, all while still isolating each tenant’s data.</p>]]></content><author><name></name></author><category term="aws" /><category term="SaaS" /><category term="AppSync" /><category term="Step Functions" /><summary type="html"><![CDATA[As a builder of SaaS software, I often find myself looking at services like AppSync with a bit of jealousy. See, AppSync has a way for you to interact directly with services like DynamoDB, removing the need for a Lambda function, and the cold starts that come with it. As a SaaS builder, these direct integrations have always been out of reach because of the inability to secure the data at the tenant level. Due to some features introduced by the Step Functions team last year, there now is a way. In this post, I’ll walk you through how you can access DynamoDB data from an AppSync API without the need for a Lambda function, all while maintaining tenant data isolation.]]></summary></entry><entry><title type="html">Securing Cross-Account Access in Multi-Tenant SaaS Applications</title><link href="https://jason.wadsworth.dev/securing-cross-account-access-in-multi-tenant-saas-applications/" rel="alternate" type="text/html" title="Securing Cross-Account Access in Multi-Tenant SaaS Applications" /><published>2024-01-11T00:00:00+00:00</published><updated>2024-01-11T00:00:00+00:00</updated><id>https://jason.wadsworth.dev/securing-cross-account-access-in-multi-tenant-saas-applications</id><content type="html" xml:base="https://jason.wadsworth.dev/securing-cross-account-access-in-multi-tenant-saas-applications/"><![CDATA[<p>If you’re building a SaaS solution, it’s critically important that you protect and isolate your customer’s data from other customers (often referred to as tenants). For companies building SaaS on AWS, one aspect of their isolation strategy is to connect the data that resides in tenant-owned AWS account(s) with your SaaS application running in your, SaaS provider-owned, AWS accounts.</p>

<p>AWS recommends using the <a href="https://docs.aws.amazon.com/STS/latest/APIReference/welcome.html">AWS Security Token Service (STS) API</a> to make calls to get <a href="https://docs.aws.amazon.com/IAM/latest/UserGuide/id_credentials_temp.html">temporary credentials</a> for this type of cross-account access. This API leverages <a href="https://docs.aws.amazon.com/iam/">AWS Identity and Access Management (IAM)</a> roles to provide access between AWS accounts.</p>

<p>But what are you doing to make sure these roles are only being used to connect the correct tenant accounts? In a multi-tenant application, there are two primary concerns for protecting your tenants’ accounts; the potential for one tenant, a bad actor, to use the information of another tenant to gain access to that tenant’s data using your application, and your own mistakes. In this blog, we examine methods of securing cross-account access using STS to ensure our customers’ data is secure and isolated.</p>

<h2 id="protection-from-bad-actors---the-confused-deputy-problem">Protection From Bad Actors - The Confused Deputy Problem</h2>

<p>When your application needs to access data in your tenants’ accounts, you use the <a href="https://docs.aws.amazon.com/STS/latest/APIReference/API_AssumeRole.html">Assume Role API</a> to get temporary credentials. Without some extra protection, this opens the door for a bad actor to take advantage of the <a href="https://docs.aws.amazon.com/IAM/latest/UserGuide/confused-deputy.html">Confused Deputy problem</a>. I won’t go into the problem in detail here, but stated simply, it allows one tenant to access another tenants data simply by knowing the ARN of the role in the other tenant’s account. AWS has a solution to combat this problem — the use of an <code class="language-plaintext highlighter-rouge">ExternalId</code>. There is a <a href="https://aws.amazon.com/blogs/apn/securely-using-external-id-for-accessing-aws-accounts-owned-by-others/">great post from AWS</a> about how to implement this in your application. One important element to this is that you, the SaaS provider, need to supply the <code class="language-plaintext highlighter-rouge">ExternalId</code> and make sure it is a unique value in your application. By being the owner of the ID you can be sure that a second tenant cannot use the same ID in their tenant. When a tenant adds an AWS account to your application they must take the ID you supplied and include it in the assume role policy for the role they want to assume. This makes sure the tenant has access to that role.</p>

<h2 id="protection-from-yourself---the-bad-code-problem">Protection From Yourself - The Bad Code Problem</h2>

<p>I have a saying — “if your idea of data protection is a where clause in SQL, you aren’t protecting my data.” That saying doesn’t translate perfectly well to this subject, but the point is that you can’t rely on your code to protect your tenants’ data. You need something more; something that makes sure bad code doesn’t lead to a break in isolation.</p>

<p>As much as we try to avoid it, mistakes happen when writing code. We have processes in place to help avoid the mistakes — code reviews, automated tests — but we can’t eliminate them entirely. We can, however, plan for them and build a system that fails safely. I talk about this subject a lot, but it’s typically talking about things like DynamoDB or S3 data. Data that you, the SaaS provider control. It turns out we can leverage the same sort of techniques to be sure we don’t accidentally assume a role for the wrong tenant.</p>

<p>First, let’s talk a bit about what the problem is we are trying to solve. Imagine the worst-case scenario where there is hard-coded data in your application that makes its way to production. This hard-coded data uses a single tenant’s role ARN and external ID to make calls into their AWS account. Now all your tenants are seeing that one tenant’s data. While this example is extreme, there are less extreme ways to have the same, or similar, results. What we need is a way that even bad code can’t lead to a break in isolation.</p>

<p>If you’ve heard me speak on the subject, or have read my blog post on <a href="https://jason.wadsworth.dev/multi-tenant-security-implementation/">Multi-tenant Security Implementation</a>, you know that we don’t give our code (typically running in Lambda) permission to access tenant data. Instead, we pass in credentials that are used to access the data. These credentials are created using a dynamic policy that limits access to only that tenant’s data. We’ll do the same thing here, but instead of accessing data, we’ll limit the ability to call the Assume Role API for the specific tenant’s role.</p>

<p>To do this, we take advantage of the <code class="language-plaintext highlighter-rouge">iam:ResourceTag</code> condition. This condition allows you to require that the role being assumed includes a tag with a specific value. For our example, we’ll call the tag MyApplicationTenantId. The condition will require that the role being assumed is tagged with a tag called MyApplicationTenantId and a value of that tenant’s ID in our application. The dynamic policy looks something like this:</p>

<pre><code class="language-TypeScript">{
	Action: ['sts:AssumeRole'],
	Effect: 'Allow',
	Resource: ['*'],
	Condition: {
	    StringEquals: {
	        'iam:ResourceTag/MyApplicationTenantId': tenantId,
	    },
	},
},
</code></pre>

<blockquote>
  <p>NOTE: You may have noticed that we are allowing all resources. Add specific resources to further restrict that if you’d like, but the condition is good enough for this use case. I’ve used the path of the role in the past but since the console doesn’t allow you to set the path it limits how customers can configure this role.</p>
</blockquote>

<p>When the customer creates the role in their AWS account they include the tag <code class="language-plaintext highlighter-rouge">MyApplicationTenantId</code> on that role and set its value to their tenant ID in your application.</p>

<h3 id="setting-the-source-identity-to-secure-assumerole">Setting the Source Identity to Secure AssumeRole</h3>

<p>If you’re familiar with the <a href="https://docs.aws.amazon.com/STS/latest/APIReference/API_AssumeRole.html">Assume Role API</a> you may be aware of some of its limits, particularly as it relates to <a href="https://docs.aws.amazon.com/IAM/latest/UserGuide/id_roles_terms-and-concepts.html#iam-term-role-chaining">role chaining</a>. Role chaining, simply put, is assuming one role and then using those credentials to assume another role. There are other limitations to be aware of if you are going to use role chaining but one that is important to our scenario is that role chaining requires that you have permission to <a href="https://docs.aws.amazon.com/IAM/latest/UserGuide/id_credentials_temp_control-access_monitor.html">set the source identity</a> when calling the API. This permission must exist on both the assume role policy document of the role being assumed as well as the permissions of the role doing the assuming. So for our code to work, we need to add a couple of things.</p>

<p>First, we need to add permissions to the assume role policy document on the role we are assuming. The full policy will look something like this:</p>

<pre><code class="language-JSON">{
    "Version": "2012-10-17",
    "Statement": [
        {
            "Effect": "Allow",
            "Principal": {
                "AWS": "arn:aws:iam::012345678912:root"
            },
            "Action": "sts:AssumeRole",
            "Condition": {
                "StringEquals": {
                    "sts:ExternalId": "my-application-provided-external-id"
                }
            }
        },
        {
            "Effect": "Allow",
            "Principal": {
                "AWS": "arn:aws:iam::012345678912:root"
            },
            "Action": "sts:SetSourceIdentity"
        }
    ]
}
</code></pre>

<p>It’s important to note that you can’t include the condition statement on <code class="language-plaintext highlighter-rouge">sts:SetSourceIdentity</code>, but that’s okay because it’s only used in the context of assuming a role.</p>

<p>We also need to add the <code class="language-plaintext highlighter-rouge">sts:SetSourceIdentity</code> permission to the role doing the assuming. Our dynamic policy now looks something like this:</p>

<pre><code class="language-TypeScript">{
    Action: ['sts:AssumeRole'],
    Effect: 'Allow',
    Resource: ['*'],
    Condition: {
        StringEquals: {
            'iam:ResourceTag/MyApplicationTenantId': tenantId,
        },
    },
},
{
    Action: ['sts:SetSourceIdentity'],
    Effect: 'Allow',
    Resource: ['*'],
},

</code></pre>

<p>With this in place, you can safely assume your tenants’ roles without being concerned you’ll get data for the wrong tenant. Even if you have a hard-coded value in your code the permissions of the credentials your code uses won’t have permission to assume the role.</p>

<h2 id="conclusion">Conclusion</h2>

<p>Building multi-tenant SaaS applications comes with important tenant isolation challenges, especially if you connect your application to customer-owned AWS accounts. Being aware of the potential for bad actors or bad code to break that isolation is a key step in understanding how to protect against it. Making sure you’ve taken all steps to secure cross-account access with solutions like the one I’ve outlined in this blog helps keep your tenants’ data safe and your application secure.</p>]]></content><author><name></name></author><category term="aws" /><category term="security" /><category term="SaaS" /><category term="AssumeRole" /><category term="STS" /><summary type="html"><![CDATA[If you’re building a SaaS solution, it’s critically important that you protect and isolate your customer’s data from other customers (often referred to as tenants). For companies building SaaS on AWS, one aspect of their isolation strategy is to connect the data that resides in tenant-owned AWS account(s) with your SaaS application running in your, SaaS provider-owned, AWS accounts.]]></summary></entry><entry><title type="html">Solving the DynamoDB EventBridge Pipes Problem</title><link href="https://jason.wadsworth.dev/solving-the-dynamodb-event-bridge-pipes-problem/" rel="alternate" type="text/html" title="Solving the DynamoDB EventBridge Pipes Problem" /><published>2023-02-27T00:00:00+00:00</published><updated>2023-02-27T00:00:00+00:00</updated><id>https://jason.wadsworth.dev/solving-the-dynamodb-event-bridge-pipes-problem</id><content type="html" xml:base="https://jason.wadsworth.dev/solving-the-dynamodb-event-bridge-pipes-problem/"><![CDATA[<p>I was really excited when AWS announced <a href="https://aws.amazon.com/eventbridge/pipes/">EventBridge Pipes</a> at re:Invent last year. This was going to simplify all the CDC (change data capture) code I find myself writing, and probably reduce my Lambda spend.</p>

<p>At first, everything was going great. I was able to create EventBridge events directly from my DynamoDB stream records with some simple JSON path. Then I ran into a problem, and I wasn’t alone.</p>

<h2 id="the-problem">The Problem</h2>

<p>Everything worked great when you have simple records in DynamoDB, and even complex objects would be easy enough. Where things fell apart was when I had a list. It wasn’t a complicated record. The data looks like this:</p>

<pre><code class="language-JSON">{
	"id": "ABCDEFG",
	"firstName": "Jason",
	"lastName": "Wadsworth",
	"email": "jasonwadsworth@outlook.com",
	"groups": ["Administrator"]
}
</code></pre>

<p>In DynamoDB it ends up looking like this:</p>

<pre><code class="language-JSON">{
	"id": {
		"S": "ABCDEFG"
	},
	"firstName": {
		"S": "Jason"
	},
	"lastName": {
		"S": "Wadsworth"
	},
	"email": {
		"S": "jasonwadsworth@outlook.com"
	},
	"groups": {
		"L": [
			{
				"S": "Administrator"
			}
		]
	}
}
</code></pre>

<p>Now, if you’ve played with EventBridge Pipes you know that you can do a bit of a transform in target, via the input template. It’s a little odd to work with, but it gets the job done. The input template for the above would end up looking something like this (I intentionally left out the <code class="language-plaintext highlighter-rouge">groups</code> because…well, that’s the problem).</p>

<pre><code class="language-JSON">{
	"id": &lt;$.dynamodb.NewImage.id.S&gt;,
	"firstName": &lt;$.dynamodb.NewImage.firstName.S&gt;,
	"lastName": &lt;$.dynamodb.NewImage.lastName.S&gt;,
	"email": &lt;$.dynamodb.NewImage.email.S&gt;
}
</code></pre>

<p>Okay, so what about the groups? Well, turns out that this syntax only supports <em>some</em> of JSON path, and it doesn’t help here. With the help of some others I tried this, but it didn’t work.</p>

<pre><code class="language-JSON">{
	"id": &lt;$.dynamodb.NewImage.id.S&gt;,
	"firstName": &lt;$.dynamodb.NewImage.firstName.S&gt;,
	"lastName": &lt;$.dynamodb.NewImage.lastName.S&gt;,
	"email": &lt;$.dynamodb.NewImage.email.S&gt;,
	"groups": &lt;$.dynamodb.NewImage.groups.L[*].S&gt;,
}
</code></pre>

<h2 id="the-solution">The Solution</h2>

<p>After being very frustrated by this I felt there had to be a path forward. Turns out there is. The solution is in the enrichment of EventBridge Pipes. One of the enrichment options is Step Functions Express State Machines. After some trial and error I came up with the following solution (code is in CDK).</p>

<pre><code class="language-TypeScript">const userCreatedEnrichment = new StateMachine(this, 'UserCreatedEnrichment', {
	definition: new Map(this, 'UserCreatedEnrichmentMap', {}).iterator(
		new Pass(this, 'UserCreatedEnrichmentPass', {
			parameters: {
				'id.$': '$.dynamodb.NewImage.id.S',
				'email.$': '$.dynamodb.NewImage.email.S',
				'firstName.$': '$.dynamodb.NewImage.firstName.S',
				'groups.$': '$.dynamodb.NewImage.groups.L[*].S',
				'lastName.$': '$.dynamodb.NewImage.lastName.S',
			},
		}),
	),
	stateMachineType: StateMachineType.EXPRESS,
});

const pipeRole = new Role(this, 'PipeRole', {
	assumedBy: new ServicePrincipal('pipes.amazonaws.com'),
	inlinePolicies: {
		sourcePolicy: new PolicyDocument({
			statements: [
				new PolicyStatement({
					resources: [table.tableStreamArn],
					actions: ['dynamodb:DescribeStream', 'dynamodb:GetRecords', 'dynamodb:GetShardIterator', 'dynamodb:ListStreams'],
				}),
			],
		}),
		enrichmentPolicy: new PolicyDocument({
			statements: [
				new PolicyStatement({
					resources: [userCreatedEnrichment.stateMachineArn],
					actions: ['states:Start*'],
				}),
			],
		}),
		targetPolicy: new PolicyDocument({
			statements: [
				new PolicyStatement({
					resources: [defaultEventBus.eventBusArn],
					actions: ['events:PutEvents'],
				}),
			],
		}),
	},
});


new CfnPipe(this, 'UserCreatedPipe', {
	description: 'Sends UserCreated events',
	roleArn: pipeRole.roleArn,
	source: table.tableStreamArn,
	target: defaultEventBus.eventBusArn,
	sourceParameters: {
		dynamoDbStreamParameters: {
			startingPosition: 'LATEST',
			batchSize: 1,
		},
	},
	enrichment: userCreatedEnrichment.stateMachineArn,
	targetParameters: {
		eventBridgeEventBusParameters: {
			detailType: 'UserCreated',
			source: `MySource`,
		},
	},
});
</code></pre>

<p>The key here is that Step Functions DO support full JSON path. So by passing the raw data to a state machine I was able to manipulate the data exactly how I wanted it. Sure, it’s an extra step, and it would be nice if EventBridge Pipes would fix it, but this is still better than writing more Lambda code.</p>]]></content><author><name></name></author><category term="aws" /><category term="serverless" /><category term="DynamoDB" /><category term="EventBridge Pipes" /><summary type="html"><![CDATA[I was really excited when AWS announced EventBridge Pipes at re:Invent last year. This was going to simplify all the CDC (change data capture) code I find myself writing, and probably reduce my Lambda spend.]]></summary></entry><entry><title type="html">Creating a Unique Constraint with DynamoDB</title><link href="https://jason.wadsworth.dev/unique-constraints-in-dynamodb/" rel="alternate" type="text/html" title="Creating a Unique Constraint with DynamoDB" /><published>2023-02-15T00:00:00+00:00</published><updated>2023-02-15T00:00:00+00:00</updated><id>https://jason.wadsworth.dev/unique-constraints-in-dynamodb</id><content type="html" xml:base="https://jason.wadsworth.dev/unique-constraints-in-dynamodb/"><![CDATA[<p>There are a lot of reasons why switching from SQL to NoSQL is a good idea for much of what we as developers do. The vast majority of our work is OLTP, transactional data processing, where we know what the access patterns are and can design our NoSQL data storage in a way that supports those access patterns.</p>

<p>Of course there are inevitably things that are not natively supported in NoSQL databases like DynamoDB, and often these things are a hurdle to those looking to make the transition. One of those things is the unique constraint.</p>

<h2 id="definition">Definition</h2>

<p>If you’re not familiar with unique constraints, they are a way of guaranteeing that there is only one instance of a particular value (or set of values if it is a composite constraint) in a table. It’s different than the primary key in that it isn’t…well…the primary key. A good example of this is a user table where the primary key would be a <code class="language-plaintext highlighter-rouge">userId</code> of some sort, and a unique constraint would be the user’s <code class="language-plaintext highlighter-rouge">email</code>. In a SQL database you can have this constraint keep you from being able to have two users with the same email because the table will not allow duplicates.</p>

<p>In DynamoDB there isn’t a unique constraint, but there is a way to get the same behavior. Here is how you do it.</p>

<h2 id="transactions-to-the-rescue">Transactions to the rescue</h2>

<p>There was a Twitter thread recently debating the value of DynamoDB transactions. I know there are some who don’t like them, but this is one example of why I think they are valuable.</p>

<p>With a DynamoDB transaction you can create a limited ACID transaction on a set of records. For the example of the <code class="language-plaintext highlighter-rouge">email</code> constraint on a user you need just two (DynamoDB supports up to 100 records at the time of this writing, with a 4MB total size limit). So what does this transaction look like?</p>

<p>Basically you have a <code class="language-plaintext highlighter-rouge">Put</code> for each unique constraint and one for the primary record. If you’re doing a single table design this can all be targeting the same table, but DynamoDB transactions can work across many tables. Each constraint record’s key (combination of Partition Key and Sort Key) uniquely identifies it on the table. Each <code class="language-plaintext highlighter-rouge">Put</code> includes a condition that requires that the record either doesn’t already exist or is owned by the user being updated.</p>

<p>Here’s an example what that might look like:</p>

<pre><code class="language-TypeScript">const user = {
	userId: 'User1',
	email: 'john@example.com',
	first: 'John',
	last: 'Doe'
};

await documentClient.send(new new TransactWriteCommand({
    TransactItems: [
        {
            Put: {
                Item: { pk: user.email, sk: 'EmailConstraint', userId: user.userId },
                TableName: 'User',
                ConditionExpression: 'attribute_not_exists(pk) OR userId = :userId',
                ExpressionAttributeValues: {
                    ':userId': user.userId,
                }
            }
        },
        {
            Put: {
                Item: { ...user, pk: user.userId, sk: 'User' },
                TableName: 'User'
            }
        }
    ]
}));
</code></pre>

<p>The first <code class="language-plaintext highlighter-rouge">Put</code> has a unique value of the <code class="language-plaintext highlighter-rouge">email</code> and the value <code class="language-plaintext highlighter-rouge">'EmailConstraint'</code>. The second <code class="language-plaintext highlighter-rouge">Put</code> has a unique value of the <code class="language-plaintext highlighter-rouge">userId</code> and the value <code class="language-plaintext highlighter-rouge">'User'</code>. That means that you can only have one record with a particular email in the table, and only one record with a particular userId. The <code class="language-plaintext highlighter-rouge">ConditionExpression</code> on the first <code class="language-plaintext highlighter-rouge">Put</code> limits the operation by saying that the record being put must be a new record (<code class="language-plaintext highlighter-rouge">attribute_not_exists(pk)</code>) or the userId of the current record must be the same as the record being saved (<code class="language-plaintext highlighter-rouge">userId = :userId</code>).</p>

<p>Now imagine if we try add a second user that looks like this:</p>

<pre><code class="language-TypeScript">const user = {
	userId: 'User2',
	email: 'john@example.com',
	first: 'John',
	last: 'Roe'
};
</code></pre>

<p>Using the above transaction this would fail because the first item in the transaction would violate the <code class="language-plaintext highlighter-rouge">ConditionExpression</code>. Specifically, the record would already exist, so the <code class="language-plaintext highlighter-rouge">attribute_not_exists(pk)</code> would be false, and because the userId of the existing record is for a different user (User1), that would also be false.</p>

<p>If we change the record to have a different email it succeeds:</p>

<pre><code class="language-TypeScript">const user = {
	userId: 'User2',
	email: 'john.roe@example.com',
	first: 'John',
	last: 'Roe'
};
</code></pre>

<p>Now, let’s say we want to update the first record, so we do another transaction to update it to the following:</p>

<pre><code class="language-TypeScript">const user = {
	userId: 'User1',
	email: 'john@example.com',
	first: 'Johnathan',
	last: 'Doe'
};
</code></pre>

<p>This one will succeed. The <code class="language-plaintext highlighter-rouge">EmailConstraint</code> record’s <code class="language-plaintext highlighter-rouge">ConditionExpression</code> is satisfied. While the <code class="language-plaintext highlighter-rouge">attribute_not_exists(pk)</code> would be false, the <code class="language-plaintext highlighter-rouge">userId = :userId</code> would be true. Essentially nothing is changing on this record.</p>

<p>What about when you want to change the email of a user?</p>

<pre><code class="language-TypeScript">const user = {
	userId: 'User2',
	email: 'john@example.com',
	first: 'John',
	last: 'Roe'
};
</code></pre>

<p>Again, this would fail because the <code class="language-plaintext highlighter-rouge">EmailConstraint</code> record already exists and it does not belong to this user.</p>

<pre><code class="language-TypeScript">const user = {
	userId: 'User1',
	email: 'johnanthan@example.com',
	first: 'Johnathan',
	last: 'Doe'
};
</code></pre>

<p>This would succeed because there is no record with johnanthan@example.com as it’s key. Of course this creates a different problem. Now you have an orphaned record, <code class="language-plaintext highlighter-rouge">john@example.com</code>. Your first thought might be to include a <code class="language-plaintext highlighter-rouge">Delete</code> in the transaction, but that won’t quite work because we don’t know the email address to delete. You could look it up first, of course, but you can’t look it up within the transaction, so you’d end up possibly having out of sync data if two updates happened at the same time. Probably not a big concern for a user’s email, but it could be an issue with other data. You could make sure that the record you’re updating is still the record you read, and fail if it is not. That is a good option in some cases, when the probability of a collision is low. If it fails you can look it up again.</p>

<h2 id="embracing-eventual-consistency">Embracing eventual consistency</h2>

<p>Personally, I like to take a different approach to this problem. By using DynamoDB streams you can check for a change to the email address whenever there is a <code class="language-plaintext highlighter-rouge">MODIFY</code>, and if there is a change you can delete the old record at that time. This means that there is a period when the email is still unavailable, but it is a great way to guarantee the delete. You’ll want to do the same on a <code class="language-plaintext highlighter-rouge">REMOVE</code>, since a delete has the same problem of not knowing what the email is at the time of the delete.</p>

<h2 id="conclusion">Conclusion</h2>

<p>No, a unique constraint in DynamoDB isn’t as easy as it is in a SQL database, and you should only use it when you absolutely need it, but at least now you know that it is an option. One more excuse to to avoid NoSQL is gone.</p>]]></content><author><name></name></author><category term="aws" /><category term="serverless" /><category term="DynamoDB" /><category term="unique constraint" /><summary type="html"><![CDATA[There are a lot of reasons why switching from SQL to NoSQL is a good idea for much of what we as developers do. The vast majority of our work is OLTP, transactional data processing, where we know what the access patterns are and can design our NoSQL data storage in a way that supports those access patterns.]]></summary></entry><entry><title type="html">Multi-tenant Security Implementation</title><link href="https://jason.wadsworth.dev/multi-tenant-security-implementation/" rel="alternate" type="text/html" title="Multi-tenant Security Implementation" /><published>2022-12-05T00:00:00+00:00</published><updated>2022-12-05T00:00:00+00:00</updated><id>https://jason.wadsworth.dev/multi-tenant-security-implementation</id><content type="html" xml:base="https://jason.wadsworth.dev/multi-tenant-security-implementation/"><![CDATA[<p>In my <a href="https://jason.wadsworth.dev/multi-tenant-security/">previous post</a> I talked about why you need to think about data and security differently when working on a multi-tenant application. In this post I’ll dig in a bit deeper and show you what we did at ByteChek (RIP) for our multi-tenant strategy.</p>

<h2 id="the-architecture">The Architecture</h2>

<p>To start, let’s talk a bit about the high level architecture of the platform. 100% of the ByteChek platform is serverless. We use services like AppSync and API Gateway for synchronous communication and EventBridge, SNS, and SQS for asynchronous communication. Data is stored in S3 and DynamoDB. Compute is Lambda with a sprinkle of Step Functions for some coordination within a service. Like I said, 100% serverless. Here is a simple version of what it looks like:</p>

<p><img src="/images/2022-12-05/multi-tenant-arch.png" alt="Multi-tenant Architecture" /></p>

<h2 id="custom-authorizer">Custom Authorizer</h2>

<p>Our user interface is a React app. We use Cognito for user authentication and pass in a JWT to AppSync for requests from the app. This is the beginning of the multi-tenant strategy. As a request comes in to AppSync we use a custom authorizer on the request. There are a lot of things you can do with a custom authorizer, but the important piece for this conversation is called the resolver context (<code class="language-plaintext highlighter-rouge">resolverContext</code> in the JSON). This is a place where you can add anything you want to the request payload that AppSync will send to its resolvers. We use the resolver context to store credentials for the tenant of the user.</p>

<p>Where do we get these credentials? We use the STS (security token service) in AWS to request credentials. One of the features of the STS assume role API is the ability to pass in a policy with the request. This policy is combined with the policy of the role and the result is a set of permissions that are limited to the union of the two policies. Included in the request from Cognito is the tenant ID of that user. We use that ID to create a policy that limits access to just that tenant’s resources. We then pass those credentials along with the request, in the resolver context. I’ll show you what that looks like a bit later.</p>

<h2 id="using-the-credentials">Using the Credentials</h2>

<p>As I mentioned, we use Lambda for our compute, so all of our AppSync resolvers are Lambda functions. I’d love to do some direct integrations here (like read/write directly from/to DynamoDB) but we need some support from AWS on this front. A recent addition to Step Functions to support <a href="https://aws.amazon.com/about-aws/whats-new/2022/11/simplify-cross-account-access-aws-services-step-functions/">assuming a role within a task</a> is step in the right direction, so I feel pretty confident that the future is bright for these options. Anyway, back to our solution. Typically when you create a Lambda function you assign it permissions to do whatever it is that the function needs to do. This will include things like writing to CloudWatch Logs, possibly X-Ray, as well as making calls to a DynamoDB table or S3 bucket. In our platform these functions are almost never granted permissions for the latter. Permissions to read or write to DynamoDB and/or S3 are instead granted via the credentials passed in via the resolver context. This means that the function itself cannot make a call to get or update data directly. From a security perspective that has removed the possibility of a developer accidentally writing code to do so. Instead we provide code for them to call that takes in the AppSync event and returns an <code class="language-plaintext highlighter-rouge">AwsCredentialIdentity</code> (JavaScript SDK v3) object that can be use with a DynamoDB or S3 client (or any other AWS client). For a developer this isn’t much different than what they might be already used to doing. The biggest difference is that the client has to be created within the context of the request instead of being shared. If a developer forgets to pass in the credentials the calls don’t work because the default credentials don’t have the necessary permissions.</p>

<h2 id="asynchronous-activity">Asynchronous Activity</h2>

<p>As you’ve likely noticed, everything up to this point has been for a synchronous request made from AppSync. You likely also recall that we used services like EventBridge for asynchronous operations. How does this all work for asynchronous code? Most asynchronous actions are a result of a synchronous request, and so you might be tempted to think you can just pass along the credentials from the synchronous request and all is well. Not so fast. First, those credentials have a time limit. The default and max is one hour. While an hour is surely good enough for most things you want to be careful not to find yourself in a situation where a failure leads to an extremely difficult recovery. Also, keep in mind that a request may start near the end of that one hour limit, meaning you may be left with far less. Second, not all paths provide a way to do this neatly (DynamoDB streams come to mind here). You certainly don’t want to be storing credentials. And finally, let’s not forget I said “most”, which means there are things that don’t have any context to pull from. Any scheduled operation would fall into this category.</p>

<p>For asynchronous code our Lambda functions follow the same rule as our synchronous code; no permissions to access DynamoDB or S3. Instead they are granted permission to get credentials for a tenant. These credentials are the same credentials that are used for the synchronous case, they just are requested instead of being passed in. Everything in the system has a tenant ID in it – whether it’s a record in a DynamoDB table, or a message sent in EventBridge. As we process a record we use the tenant ID to request the credentials and use those credentials to get a DynamoDB or S3 client. Once again, if a developer forgets to pass in the credentials the calls don’t work. Furthermore, if we somehow have the wrong credentials it won’t work either.</p>

<p>A side note here. You may be asking why we don’t just request the credentials in the synchronous case. While there are some potential advantages to that approach, not the least of which is consistency throughout the code base, there is a reason to not. For synchronous request any time added to the processing of a request degrades the user experience. By getting the credentials during the custom authorizer we greatly reduce how often we need to get these credentials. You can control the cache timeout on the authorizer (we have it set to 15 minutes). This means that you only request the credentials once during that time. That can be a significant reduction in STS calls.</p>

<h2 id="the-credentials">The Credentials</h2>

<p>Okay, we’ve seen a lot about the flow of the system and when and how we get credentials. Let’s take a little bit of time to look at the specifics of the policies. I’m going to be broader in my policies that you might want to actually be, but you should be able to get the idea here.</p>

<p>First, let’s take a look at the policy attached to the role that we will be assuming. It looks something like this:</p>

<pre><code class="language-JSON">{
    "Version": "2012-10-17",
    "Statement": [
        {
            "Action": [
                "dynamodb:*Item",
                "dynamodb:Query"
            ],
            "Resource": "*",
            "Effect": "Allow"
        },
        {
            "Condition": {
                "StringEquals": {
                    "s3:prefix": [
                        ""
                    ],
                    "s3:delimiter": [
                        "/"
                    ]
                }
            },
            "Action": "s3:ListBucket",
            "Resource": "arn:aws:s3:::*",
            "Effect": "Allow"
        },
        {
            "Action": [
                "s3:ListBucket",
                "s3:ListBucketVersions"
            ],
            "Resource": "arn:aws:s3:::*",
            "Effect": "Allow"
        },
        {
            "Action": [
                "s3:PutObject*",
                "s3:GetObject*",
                "s3:DeleteObject*"
            ],
            "Resource": "arn:aws:s3:::*",
            "Effect": "Allow"
        },
        {
            "Action": "cognito-idp:*",
            "Resource": "*",
            "Effect": "Allow"
        }
    ]
}
</code></pre>

<p>Notice that this policy grants some pretty broad permissions, and it needs to. This role will be used for all requests to customer data within the system. The key is the policy used when assuming the role. That policy looks something like this:</p>

<pre><code class="language-JSON">{
    "Version": "2012-10-17",
    "Statement": [
        {
            "Action": [
                "dynamodb:*"
            ],
            "Effect": "Allow",
            "Resource": [
                "*"
            ],
            "Condition": {
                "ForAllValues:StringLike": {
                    "dynamodb:LeadingKeys": [
                        "TENANT_1_ID*"
                    ]
                }
            }
        },
        {
            "Action": [
                "s3:ListBucket"
            ],
            "Effect": "Allow",
            "Resource": [
                "arn:aws:s3:::*"
            ],
            "Condition": {
                "StringEquals": {
                    "s3:prefix": [
                        ""
                    ],
                    "s3:delimiter": [
                        "/"
                    ]
                }
            }
        },
        {
            "Action": [
                "s3:ListBucket",
                "s3:ListBucketVersions"
            ],
            "Effect": "Allow",
            "Resource": [
                "arn:aws:s3: : :*"
            ],
            "Condition": {
                "StringLike": {
                    "s3:prefix": [
                        "TENANT_1_ID/*"
                    ]
                }
            }
        },
        {
            "Action": [
                "s3:*Object*"
            ],
            "Effect": "Allow",
            "Resource": [
                "arn:aws:s3:::*/TENANT_1_ID/*"
            ]
        }
    ]
}
</code></pre>

<p>Notice the conditions and resources that include <code class="language-plaintext highlighter-rouge">TENANT_1_ID</code> in them. It’s those parts of this policy that limit the access to just that tenant’s data.</p>

<p>As I mentioned earlier, the effective permissions when assuming a role are the union between the role’s policy and the policy of the assume role request. This means that even if I add something to the policy when assuming a role I won’t actually have that permission. Or if I include a permission in the role but don’t in the policy of the request.</p>

<p><img src="/images/2022-12-05/effective-permissions.png" alt="Effective Permissions" /></p>

<p>By making tenant data security a foundation of the system we’ve made it really easy for developers to do the right thing while making it really hard not to. Starting your multi-tenant SaaS application off with a good foundation will save you from potential headaches in the future.</p>]]></content><author><name></name></author><category term="security" /><category term="SaaS" /><category term="multi-tenancy" /><category term="AWS" /><category term="serverless" /><summary type="html"><![CDATA[In my previous post I talked about why you need to think about data and security differently when working on a multi-tenant application. In this post I’ll dig in a bit deeper and show you what we did at ByteChek (RIP) for our multi-tenant strategy.]]></summary></entry></feed>